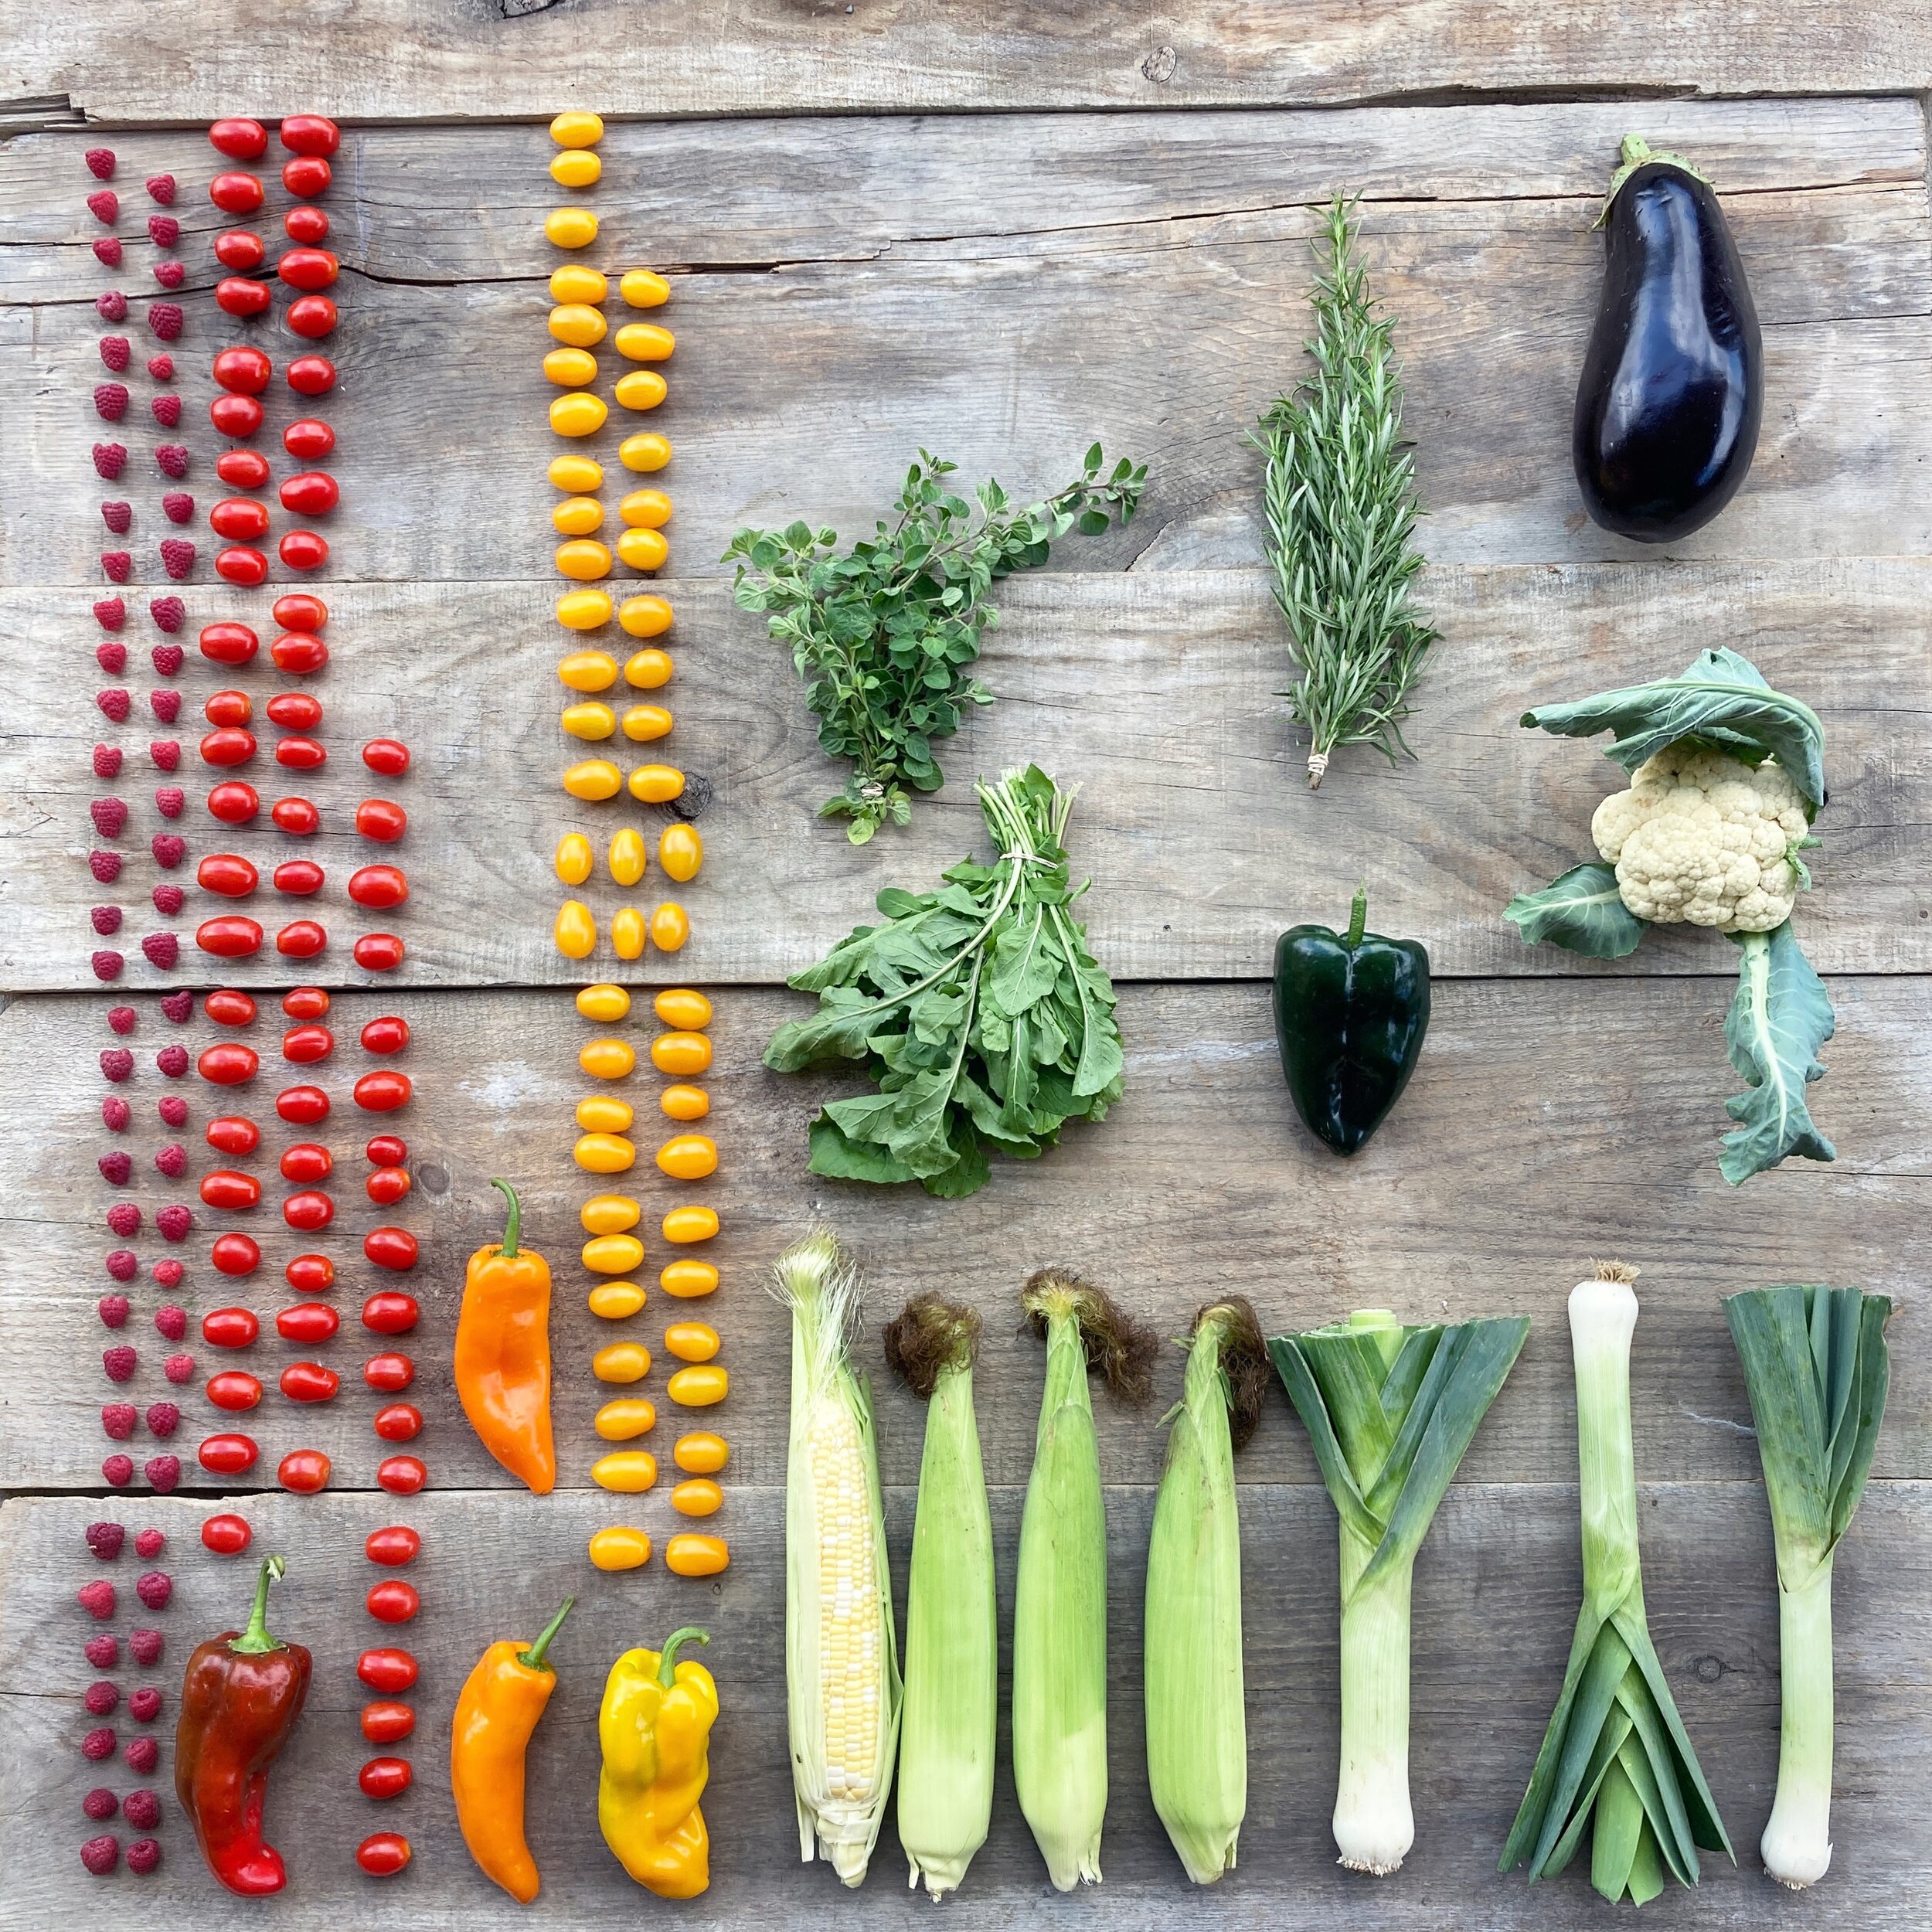
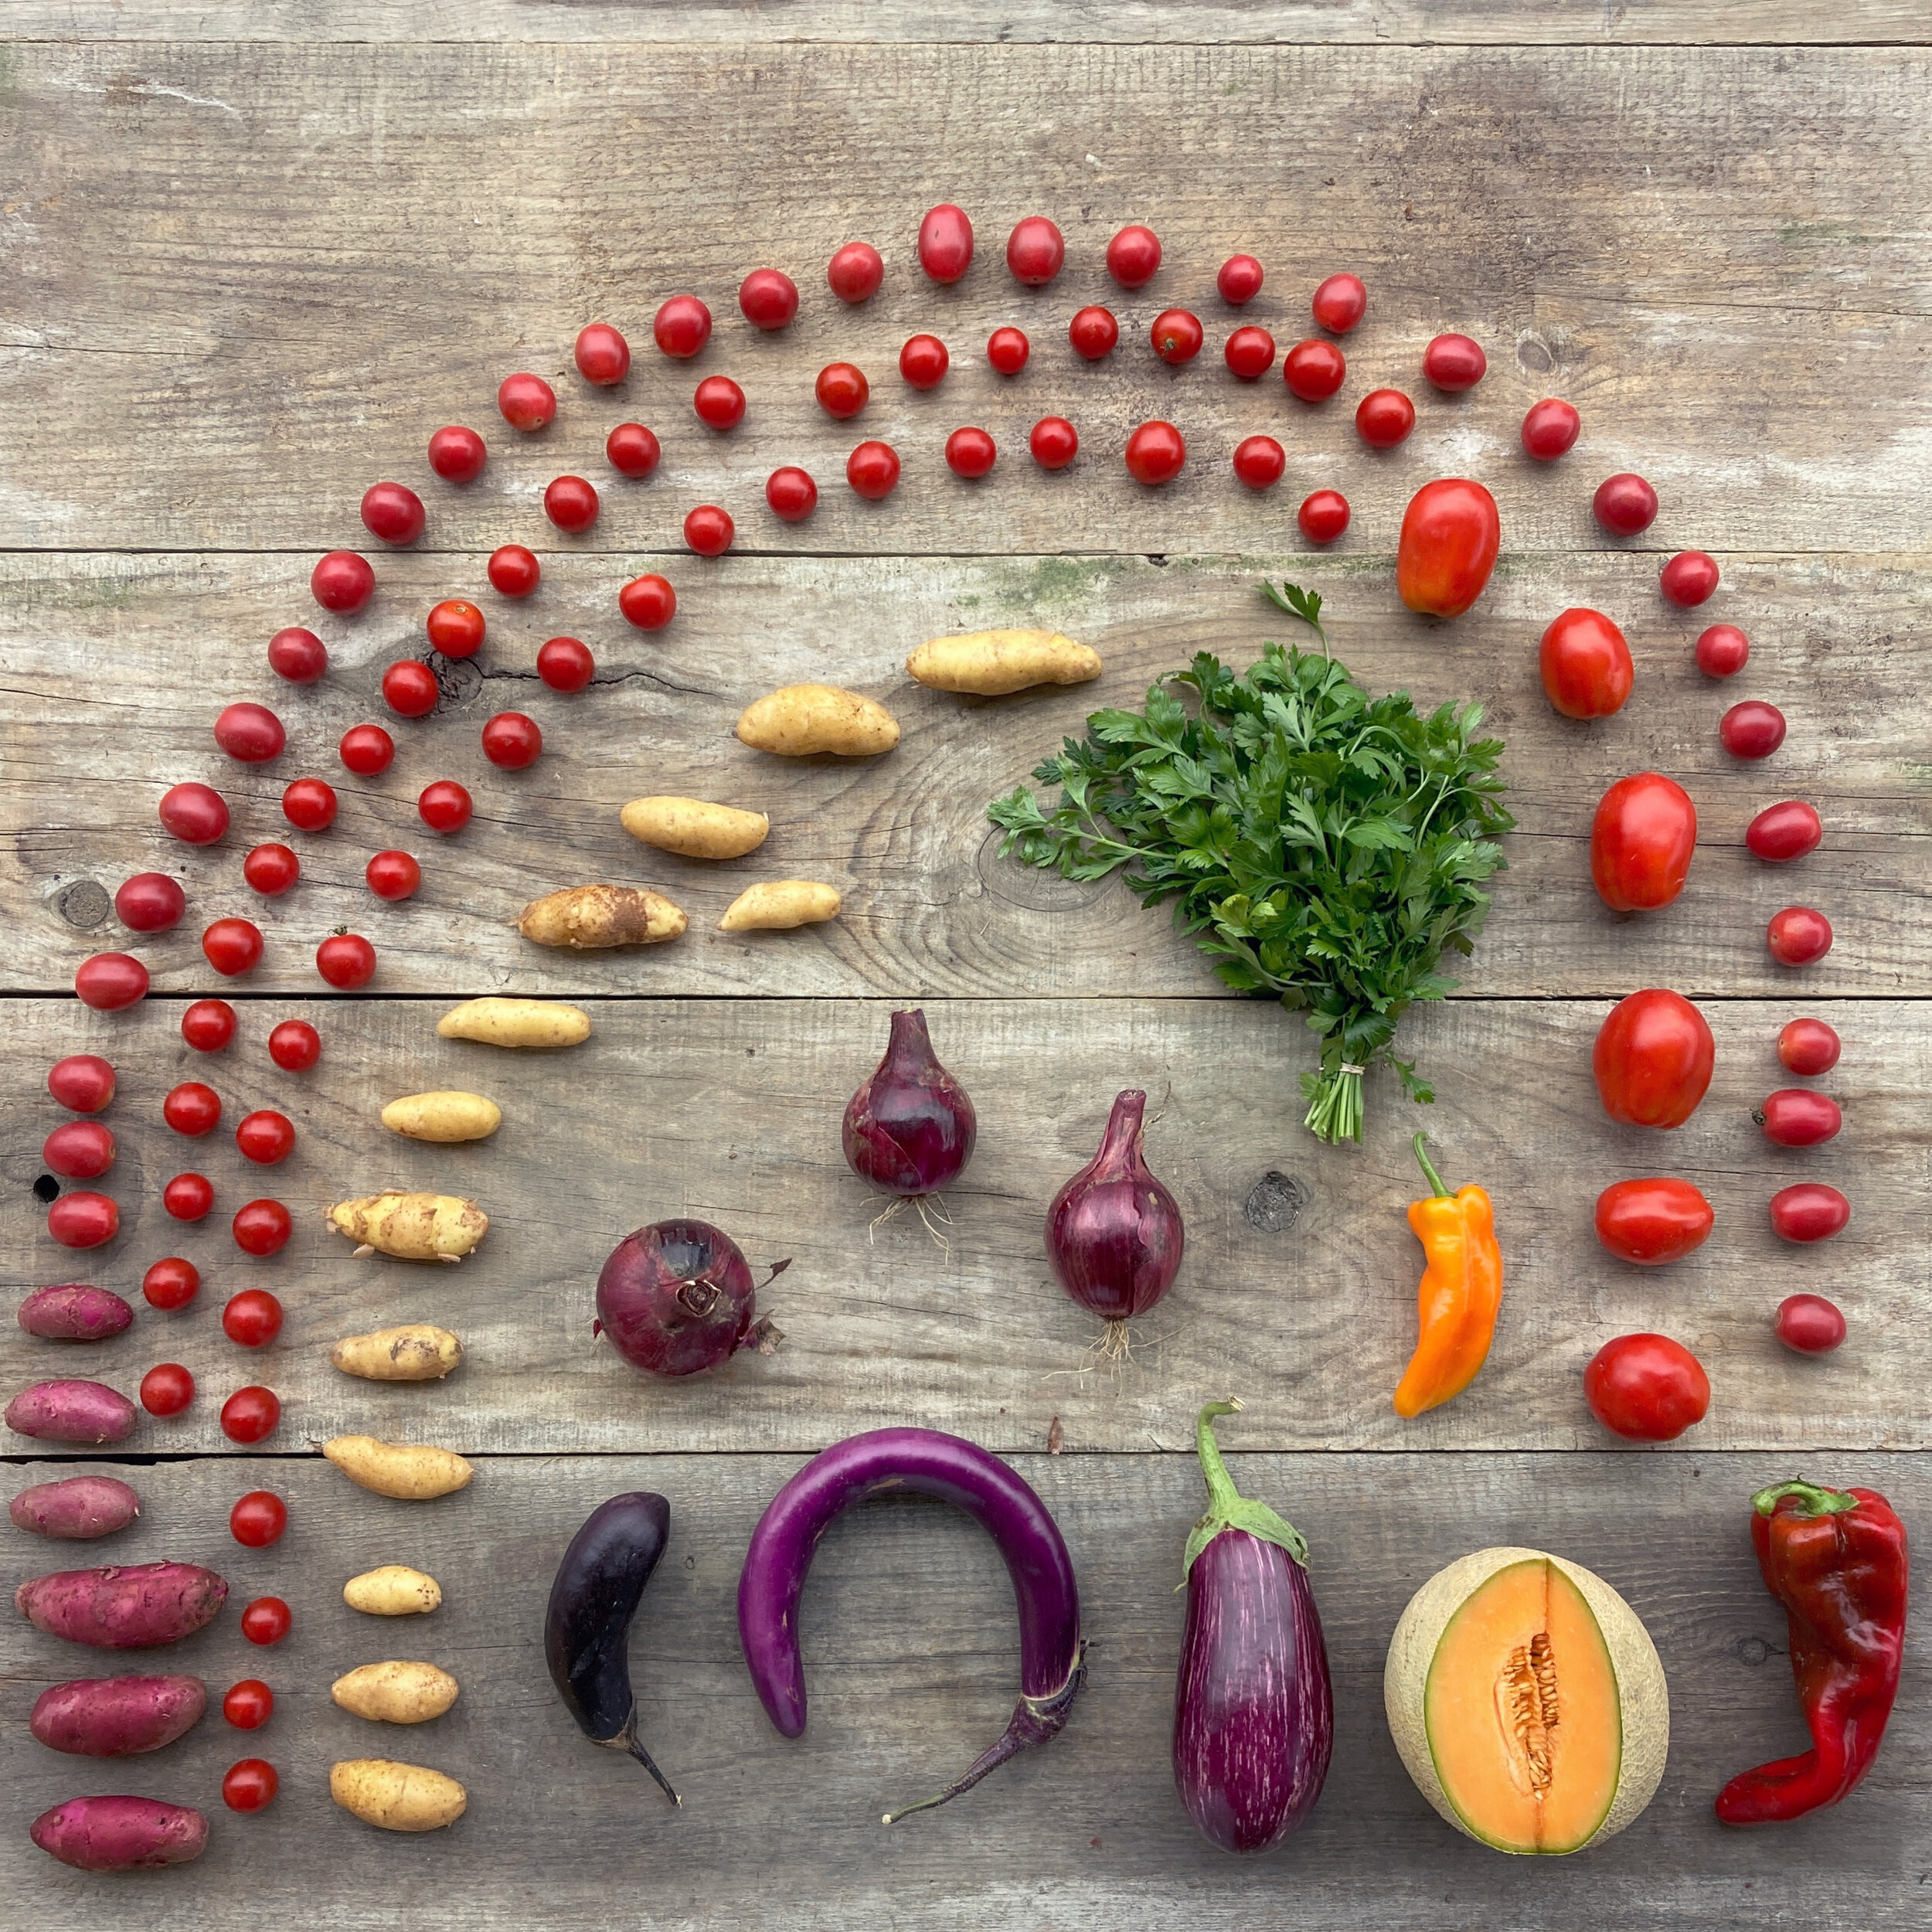
CSA WEEK 5

P I C K L I S T

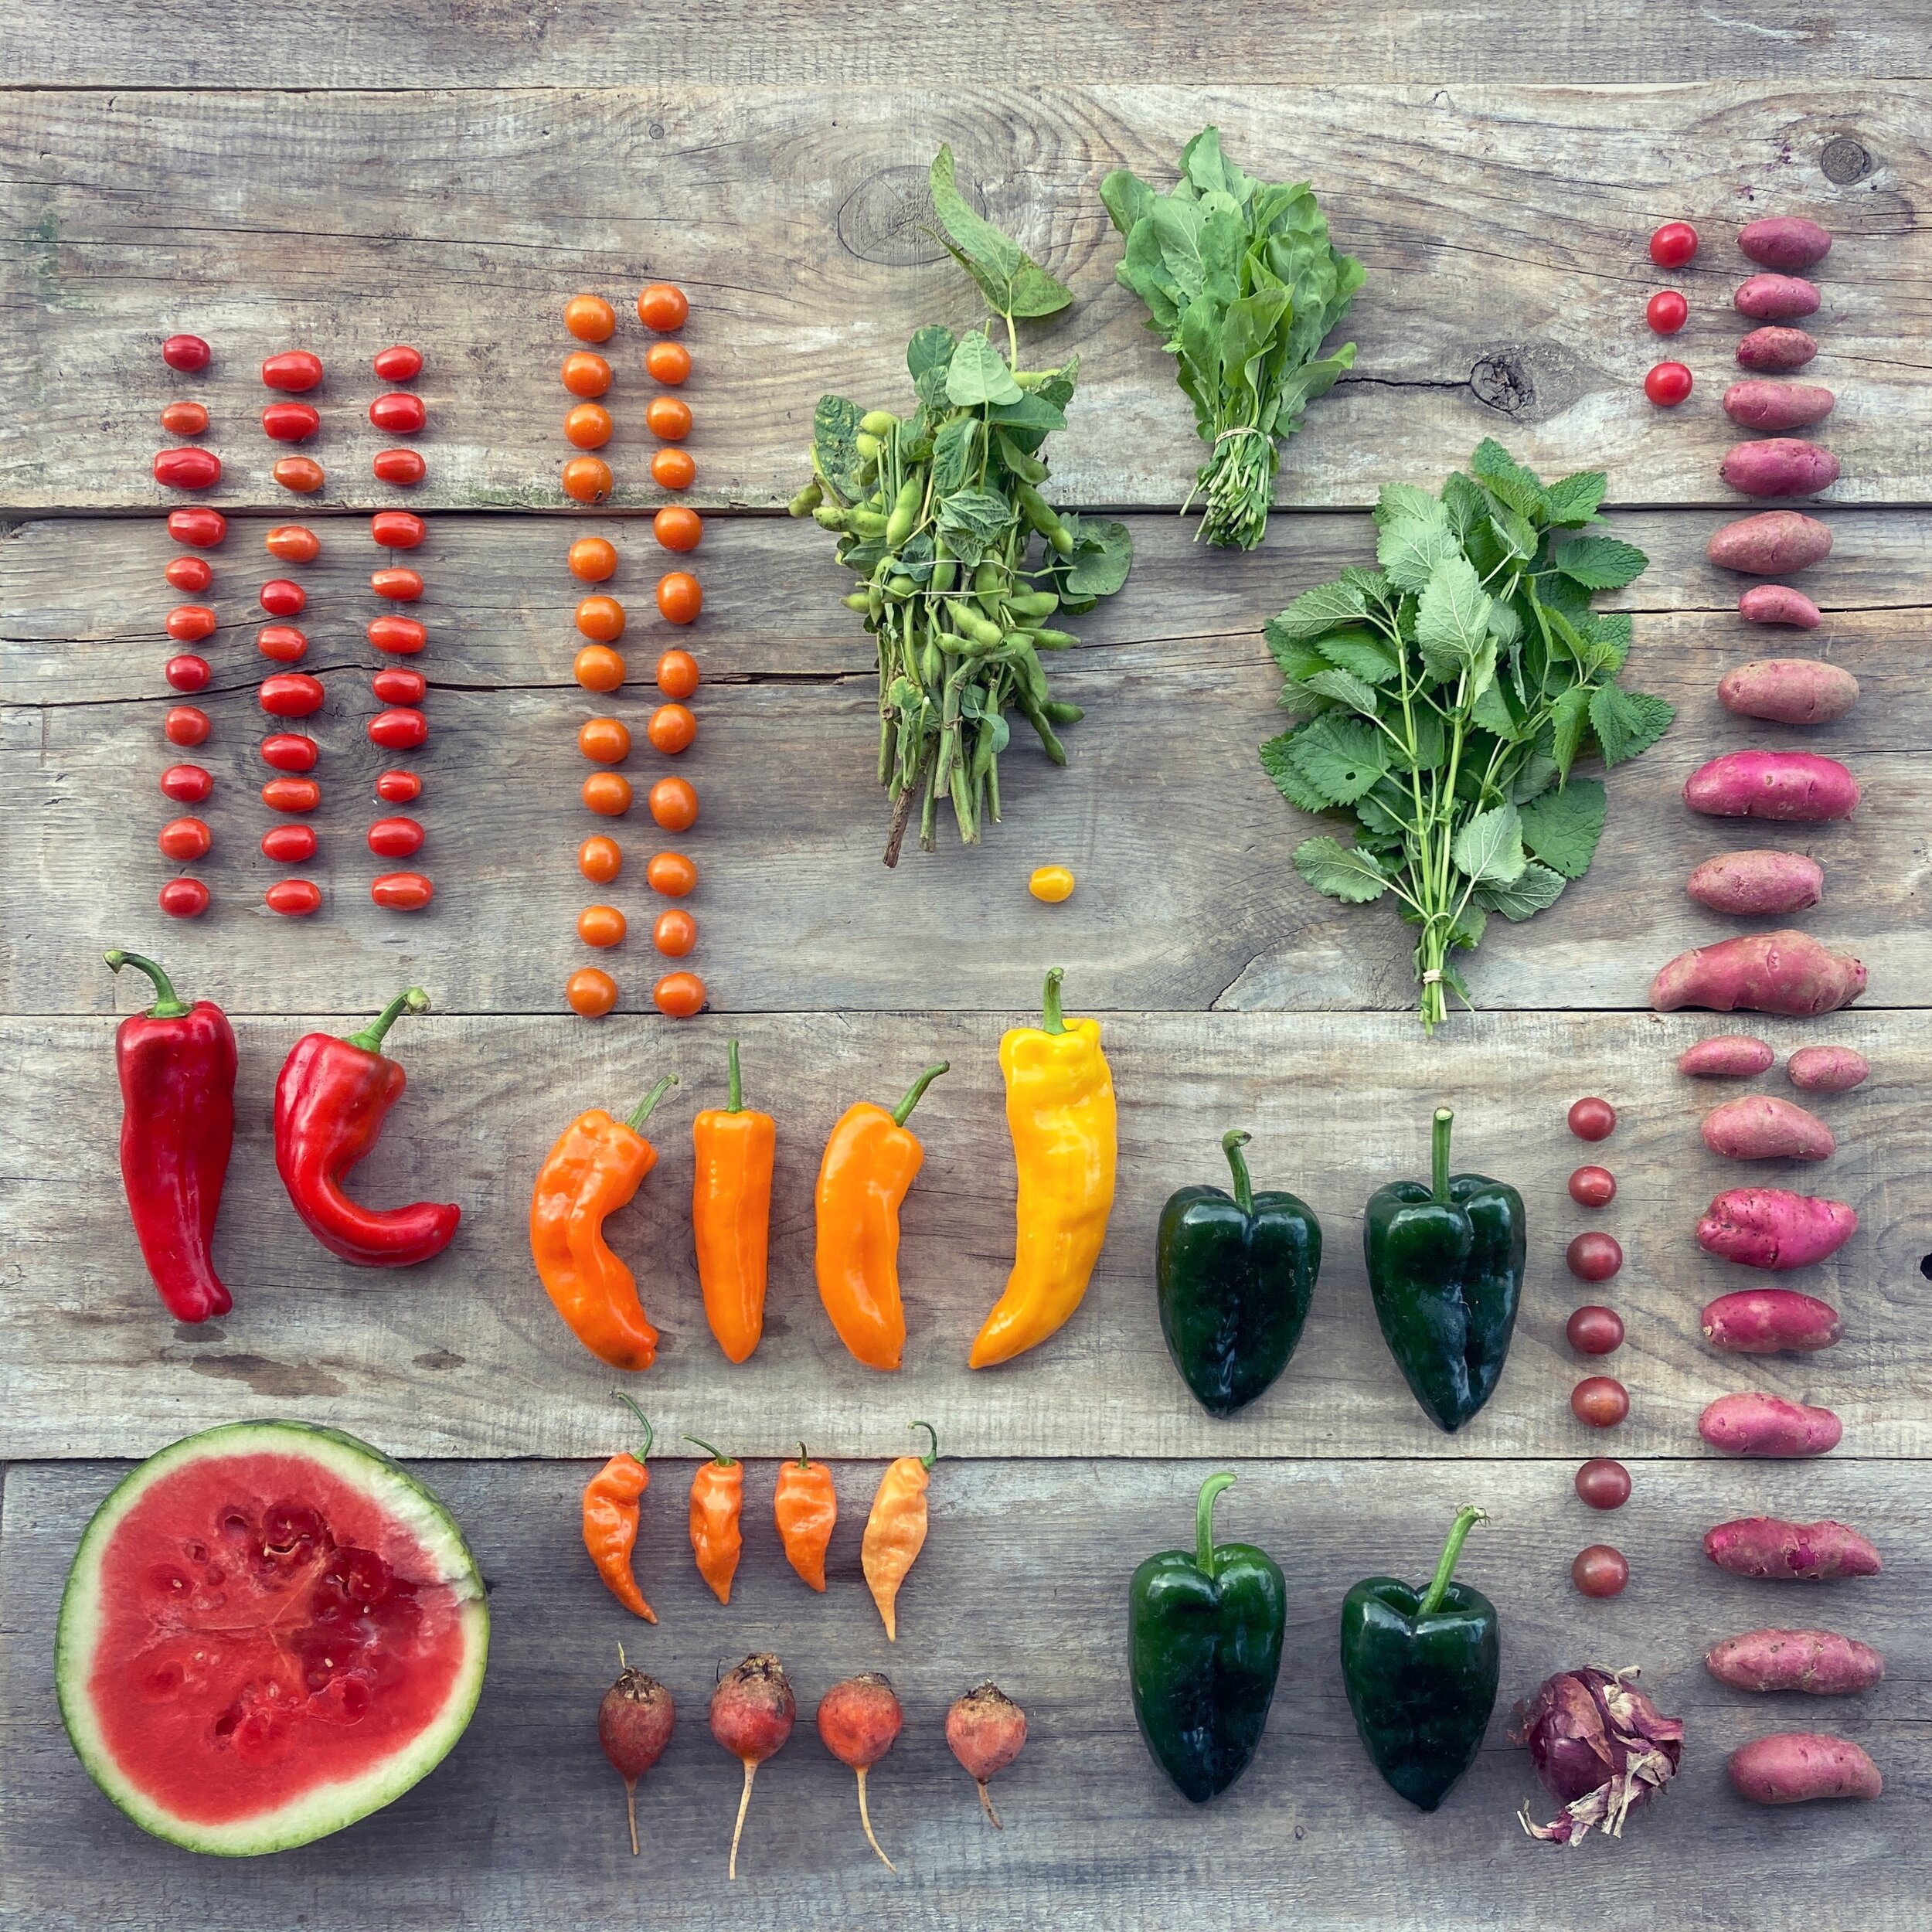
TOMATOES! - BASIL - CELERY - BROCCOLI - LETTUCE - RADISH - ZUCCHINI -

SUMMER SQUASH - PICKLES - SHISO

This week the harvest really started to pick up, and I did everything in my power to not fill your share up with only zucchini, summer squash, and cukes.  While those three main players are certainly taking up the most space in your CSA, we did manage to pick some other crops to spice it up.  However, what is a CSA if there isn't a few weeks of bumper to bumper crops?  

Also this week, it remained incredibly dry- we could use some rain… and while it poured a minute ago, the thunderstorm swept through way too fast and is just not gonna cut it.  In the next couple of days, we’re going to have to start pumping water from the river to keep crops happy and healthy.  Seems simple enough, but I can assure you it is a HUGE pain in the butt, we’d all just prefer some rain.  

All you awesome CSA gleaners came out this past Saturday and took to the fields clearing every last berry there was.  Totally warmed my heart to meet y'all, and bring you to the very place in which your food’s been coming from.  This was the official end of strawberry season and next week, hello to blueberry season. WOOT! WOOT!

OH AND LASTLY, speaking of bumper to bumper and heavy yields, we are having a sale on pickling cukes at the farmstand: If you are pumped about pickling, fermenting, etc- get in on this: 

$20 half bushel/ $38 full bushel.  

Call 603-298-5764 to place your order, leave a message if no one answers!

PRO-TIPS: 

Enter tomato basil season! we have arrived people!!! In other words, take your tomato, take your basil, sprinkle salt, find some crusty bread, and eat every damn day.  

Shiso!!: I’m very into this herb.  Lately it’s made its way into EVERY dish. From salads to sautees to eggs to just all things. Even better when paired with sesame oil, rice wine vinegar, liquid aminos, etc (And if you’ve been doing the CSA for a while now, then i have become a broken record but also hype girl for those 3 ingredients, but i digress).  For the easiest summer salad there ever was, do the following: mix lettuce with chopped herbs (basil and shiso!) add sliced radishes, dress to your pleasing. It’s perfect every time.   

JENNY’S NOTE: This recipe is super similar to the last pickle recipe but it uses shiso and it is next level divine.

  • 1/4 cup sugar

  • 1/2 cup apple cider vinegar

  • 3 tablespoons mirin

  • 1 tablespoon salt, preferably sea or kosher

  • 5 Japanese cucumbers, or 2 English cucumbers

  • 8 shiso leaves (or substitute basil)

Put sugar, vinegar, mirin and salt into a non-reactive bowl. Whisk until the sugar and salt are dissolved.  

Slice cucumbers as thinly as possible. 

Gather the shiso leaves like a deck of cards, roll into a tube and slice, chiffonade-style, like you would with basil.

Add cucumbers and shiso to the marinade and stir. Try to cover the vegetables with the marinade. It's okay if the liquid doesn't submerge the cucumbers. They will break down and get smaller as they marinate.

Put the mix in the fridge and let marinate for at least 4 hours. Mix a couple of times if you can, but it's okay if you don't. Once pointed in the right direction, cucumbers tend to take care of themselves.

Serve, icy cold out of the fridge if you can.

JENNY’S NOTE: Apparently, Meghan Markle made zucchini bolognese, told the world about it and blew everyone’s socks off.  Claire, my picking partner/ food preservation master chef made this dish for me once and it did indeed stand up to the test and my socks were in fact blown right off- try it!

This recipe is shockingly simple, and only requires a handful of easy-to-grab ingredients: water, one bouillon cube, and zucchini. I also added an onion and some garlic in order to give the dish some aromatic quality (what’s pasta without garlic?).

I started by sautéing one small onion and two cloves of garlic in about a tablespoon of olive oil. As soon as they became translucent, I tossed in the sliced zucchini and sautéed it all together for a minute or two. Meanwhile, I put the bouillon cube in a measuring cup with one cup of hot water and let it dissolve. 

Then, you are just going to add that stock created out of the water and bouillon to the pot with the zucchini, onion, and garlic. At that point, it couldn’t get easier. Just stir well, cover the pot, and reduce to a simmer. Now, just let that zucchini slow-cook until it turns mushy.

Although you’re slow-cooking the zucchini for hours, you’re going to want to check it every half hour or so because if it looks too thick or dry, you’ll need to add more water. Meghan simmered hers for four to five hours, so throwing it in a slow cooker could work here — or just keep it on the stove at low heat and keep checking out the consistency. You may discover you are ready to serve it after only around 90 minutes or so — mine was plenty mushy by then!

Finally, make your pasta and mix with the sauce. At this point, you may want to add a bit of grated Parm. I also added crushed chili flakes for a touch of heat.


Sour Pickles  from one of my fave cookbooks, GEFILTERIA / Serving Size 1 Quart of Pickles

  • 2 cups water

  • 1 heaping tablespoon kosher salt or sea salt, plus more if needed

  • 1⁄2 teaspoon yellow mustard seeds plus more if needed

  • 1⁄2 teaspoon whole black peppercorns 

  • 1-2 bay leaves (dried or fresh)

  • 1 small cinnamon stick

  • 1/2 tsp whole coriander seeds

  • 1/4 tsp whole cloves

  • 2 sprigs fresh dill… (JENNY’S NOTE: i know i know, where is the dill??  Short on the herb for this week, but make without and add it to the brine next time… because you know there will be a next time… :)

  • 3 garlic cloves, crushed

  • 1 pound cucumbers 

  •  Pour the filtered water into a clean wide-mouth quart-size jar. Pour the salt into the water, cover with a tight-fitting lid and shake to dissolve the salt.

  •  Add the dried spices, dill and garlic, then add the cucumbers (or green beans). Pack the vegetables in tightly, squeezing as many as possible into the jar, making sure the brine covers the vegetables. If it doesn’t cover the cucumbers (or beans), mix a heaping 1 ½ teaspoons of salt with 1 cup of water. Pour in enough of this mixture to cover the vegetables. Seal the jar, affixing your fermentation pipe to the lid.

  •  Let the cucumbers (or beans) sit at room temperature for 4 to 7 days. You’ll notice that the cucumbers (or beans) will turn pale after about 2 days. The time the vegetables take to ferment fully will vary depending on air temperature and elevation. Taste them each day after the fourth day until the desired level of sourness is reached. The brine will begin to appear cloudy and may be a bit fizzy.

  •  When you are happy with the taste of the cucumbers (or beans), remove all white yeast or mold from the top of your jar, if any has appeared. Seal the jar and place the pickled vegetables directly in the refrigerator. They will keep for up to 6 months.

CSA WEEK 4

p i c k l i s t

GARLIC SCAPES - HAKURAI TURNIPS - LETTUCE - BEETS - CUKES -

SUMMER SQUASH - KALE - PARSLEY - SCALLIONS

POP-UP STRAWBERRY GLEANING THIS SATURDAY

Strawberry Season comes to a close this week so let’s all go glean some berries!  


Join us Saturday afternoon for the annual CSA pop-up Strawberry Glean

Pick all you want, for free and enjoy this New England past-time.


WHO:  Open to the entire Edgewater Farm C.S.A. community

WHAT:  A Strawberry Gleaning takes place towards the end of a crop's productive season.  The purpose of the glean is to invite the C.S.A. community to the field to pick off any extra berries for their (your) own kitchen.  The gleaning will take place rain or shine (preferably shine).  The field is yours to pick through and whatever berries you can find are yours.  Bottomline, All-You-Can-Pick-FREE-Berries

WHERE:  at Edgewater Farm (park by the greenhouses)

 THE ADDRESS for all your googling:   99 River Road/ Plainfield NH 03781

 WHEN: This Saturday  July 9th... 3:00pm- 5:00pm

 HOW: You pick.  Bring containers!! 

WHY: Because it's awesome, & the berries are free & delicious & there is still some decent fruit out there


A heads up::  As it is the end of the season, along with nice berries, you will find rot   


PRO-TIPS:

These smoky grilled beets are perfectly paired with a fresh mint and parsley pesto. A finishing touch of cultured vegan cashew cheese (but you can use feta if youd rather!) and peppery micro greens (but you can use your big head lettuce) rounds everything out. Ten-ish ingredients and simple cooking methods yield an unusual and flavourful vegetable side dish. Instructions for roasting the beets are also included in this recipe.

Prep Time20 minutes/ Cook Time50 minutes/ Total Time1 hour 10 minutes/ Servings4 -6/ AuthorLaura Wright

  • 2 bunches medium-sized beets, scrubbed (about 750 grams)

  • 2 garlic scapes

  • 1 tablespoon capers, drained

  • ¼ cup shelled pistachios

  • 1 cup mint leaves, very lightly packed

  • 1 cup parsley leaves, lightly packed

  • 2 tablespoons lemon juice

  • 2 teaspoons light miso

  • ⅓ cup olive oil, plus extra

  • ½ teaspoon smoked paprika

  • sea salt and ground black pepper, to taste

  • Handful chopped lettuce

  • 1 oz of feta

  1. Bring a large pot of salted water to a boil. Once boiling, drop the beets into the water. Bring the beets up to a boil. Lower the heat to a simmer and cook until the beets are tender when pierced with a knife, about 30-40 minutes. Drain the beets and set aside to cool slightly. Once you can handle them, slip the skins off of the beets. Set the peeled beets aside.

  2. While the beets are simmering, make the pesto. In a food processor fitted with the “S” blade, place the garlic scapes, capers, and pistachios. Pulse these items a couple times until finely chopped. Then, to the food processor, add the mint, parsley, lemon juice, miso, salt, and pepper (being careful on the salt because the miso and capers are quite salty). Pulse this mixture until the herbs are finely chopped. Then, with the motor on low, drizzle the olive oil in through the feed tube until you have a slightly fluid paste. Scrape down the sides of the food processor bowl and pulse a couple more times. Check the pesto for seasoning, adjust if necessary, and set aside.

  3. Preheat a grill to high. Cut the beets into halves (or into quarters if you like and don’t mind fussing with them on the grill). Place the cut beets in a medium bowl and toss them with olive oil, the smoked paprika, salt, and pepper. Once evenly coated, set aside.

  4. Using tongs, carefully place the beets on your preheated grill. Let them sit for about 4-5 minutes, or until there is some slight charring on the side facing the grill. Flip the pieces of beet over and grill for another 4-5 minutes to get slight charring on the other side. Remove the beets from the grill.

  5. To serve, spread the pesto out evenly on a dinner plate-sized platter. Arrange the grilled smoky beets on top. Top the beets with the chopped lettuce, the crumbled cheese (if using), some extra mint, a few twists of black pepper, and some extra capers if you like. Serve warm or at room temperature.

Notes

  • You could also roast the beets. Just fully dry the boiled beets, cut them into halves or quarters, and then toss them with olive oil, the smoked paprika, salt, and pepper before spreading out on a baking sheet. Roast at 400 for about 25 minutes or until you get some light caramelization on the edges.

  • If your beets came with beautiful greens, save them! I usually just sauté them with garlic, chili, and a splash of sherry vinegar at the end.

JENNY’S NOTE: I know I know, a jam recipe but no berries this week!?!?!  This is to prepare you for Saturday’s glean- Because all berries, despite signs of age, bugs, and weathering make a great jam.  

Making your own strawberry jam is as easy as one-two-three. The only ingredients you need to make this recipe are whole, hulled strawberries, sugar, and lemon juice. For a quick breakfast or snack, toast slices of country-style bread and top with ricotta cheese and a dollop of jam.

Yield:Makes 1 3/4 cups

1 quart hulled strawberries

1/2 cup sugar

2 tablespoons fresh lemon juice

In a food processor, process strawberries until coarsely chopped. Transfer to a large skillet and stir in sugar and lemon juice. Cook over medium-high, stirring frequently, until jam is thickened and bubbles completely cover surface, 9 to 10 minutes. Transfer jam to a jar and let cool to room temperature. (To store, seal jar and refrigerate, up to 10 days).


CSA WEEK 3: JUNE 30TH

- P I C K L I S T -

GARLIC SCAPES - MINT - THAI BASIL - BOK CHOY - PICKLING CUKES - ZUCCHINI - GOLDEN ZUCCHINI - STRAWBERRIES - CELERY - LETTUCE - RADISH

This week on the farm I really got into rage picking.  What is rage picking? Rage picking is the natural farming response to the body when shocking changes take place in your country and you have a field of _________ (fill in the crop) ahead of you to pick.  I’m pretty familiar with rage picking at this point, but this last week threw me hard.  

Please know that many of your vegetables this week were picked, bagged, and bunched, with all too many tears, expletives, deep breaths, and now whats?.  

Not too sure where to go from here- the berries still need picking, the fields still need weeding, the Fall crops still need seeding.  So we pick, weed, and seed.  Field conversations feel heavier this week, but there are moments to be grateful for- moments of pure delight.  The rain was a welcome addition to the soil, and all plants are jumping.  The tomatoes were staked and strung.  Strawberry shortcakes were consumed.  Water was jumped in.  Also, this week we began our own household- winter ready- strawberry processing.  For a family of 4, we pick and freeze 13 flats of strawberries (that’s 104 quarts give or take the few that are snacked on along the way).  This amount seems totally bananas BUT, we get berries in the deepest darkest months of Winter and it carries us right through to the next berry season.  Just pop off the green tops, place in freezer ziplocs, and remove as much air as possible from the baggie.  You will be pumped come January.  

Also, over this next week, I highly recommend a visit to the PYO berry fields followed by an afternoon to potentially late night of berry processing- freezing, jamming, saucing, fermenting, etc… current events or not, the sun is high, the days are long, and tis the season.  

PRO-TIPS:

JENNY’S NOTE:

Recipe has been modified to complement this week’s CSA.   For original recipe, click above link

Prep Time30 minutes/ Cook Time5 minutes/ Total Time35 minutes/ Servings6/ Author Laura Wright

Chili Maple Peanuts (makes extra)

  • 1 cup roasted and salted peanuts

  • 2 ½ tablespoons maple syrup

  • ½ teaspoon ground chillies

Dressing

¼ cup plus 1 tablespoon coconut aminos

2 tablespoons lime juice

3 tablespoons rice vinegar

¼ cup avocado oil or other neutral oil

½ - 1 teaspoon chili oil

1 teaspoon cane sugar/agave nectar/maple syrup

ground black pepper, to taste

Rice Noodle Salad

16 oz Brown rice noodles (or any rice noodles)

avocado oil

sea salt and ground black pepper, to taste

3 sticks celery, finely sliced

1 cup chopped bok choy

1 cup cucumbers chopped

4-5 radishes, chopped

3 scallions, sliced thin

⅓ cup mint leaves, chopped

⅓ cup Thai basil leaves, chopped

  1. Make the chili maple peanuts. Preheat a dry, medium skillet over a medium-high heat. Add the peanuts, maple syrup, and chillies. It's going to really sizzle! Cook, stirring frequently, until syrup is caramelized/clinging and the peanuts are toasted, about 1-2 minutes. Transfer the peanuts to a plate and scatter them out in a single layer with a spatula. Let them cool completely.

  2. Make the dressing. In a sealable jar, combine the coconut aminos, lime juice, rice vinegar, avocado oil, chili oil, sugar, and black pepper. Close the lid tightly and give it a vigorous shake to combine. Set aside.

  3. Cook the rice noodles according to package directions and drain. As soon as you drain them, run some cold water over the noodles to cool them down and to wash off excess starch. Then, drizzle a bit of avocado oil over the drained noodles and give them a toss with your hands to coat.

  4. Transfer the cooked rice noodles to a large bowl and toss them with half of the dressing and some salt and pepper.

  5. Roughly chop the cooled chili maple peanuts.

  6. To the noodles, add the celery, cucumbers, bok choy, radishes, scallions, mint, Thai basil, and remaining dressing. Give everything a good toss to combine. Check the salad for seasoning and adjust if necessary. Then, garnish the rice noodle salad with more herbs and the chopped chili maple peanuts. I like to reserve some of the peanuts for topping individual servings.

  7. Enjoy!

Notes

  • You can use Tamari instead of coconut aminos. I do find that Tamari has a deeper, much more salty flavour, so I would cut the amount back to 1/4 cup or even 3 tablespoons if you're sensitive to salty flavours.

  • I use the ground Guntur Sannam Chillies from Diaspora Co. for the peanuts. They are incredible here!

  • The chili maple peanuts can go from perfectly glazed and golden to burnt really fast. I recommend keeping an eye on them the entire time and stirring constantly.


6 cucumbers (about 1 lb.)

1 tsp. Diamond Crystal or ½ tsp. Morton kosher salt

1 garlic clove, finely grated (or scape!)

¼ cup tahini

3 Tbsp. fresh lime juice

1 Tbsp. soy sauce

1 Tbsp. unseasoned rice vinegar

1 Tbsp. white miso

1 tsp. finely grated ginger

1 tsp. sugar

1 tsp. toasted sesame oil

Chili oil (for serving)

2 scallions, thinly sliced on a diagonal

1 tsp. toasted sesame seeds

Cut cucumbers in half lengthwise, then slice ¼" thick on a deep diagonal into 2"–3"-long pieces. Transfer cucumbers to a large bowl, add salt, and toss to combine. Cover and chill for at least 1 hour and up to 12 hours. Drain cucumbers.

Whisk garlic, tahini, lime juice, soy sauce, vinegar, miso, ginger, sugar, and sesame oil in a small bowl to combine. Pour dressing over cucumbers and toss well to coat.

Transfer cucumber salad to a platter. Drizzle with chili oil and top with scallions and sesame seeds.


AUNT DODE’S RIVER ROAD FAMOUS REFRIGERATOR PICKLES!

These easy peezy pickles are a hit with the kids and are forever stocked in Anne Sprague’s kitchen from now til frost.

  1. Slice cucumbers into 1/4 inch thick full moons, place in bowl/jar.  

  2. Pour Marukan’s seasoned rice vinegar (can get at most grocery stores) over cucumbers until submerged.  

  3. Add a little salt and pepper to the bowl, cover and leave in the fridge overnight. 

 It's that perfect cucumber turned pickled snack we all need come Summer.  


CSA WEEK 2: June 22nd

- p i c k l i s t -

GARLIC SCAPES - SCALLIONS - BIG BEAUTIFUL  BASIL - BOK CHOY - RHUBARB - 

STRAWBERRIES - CELERY - LETTUCE

Just on time, with the arrival of the Summer Solstice, came the arrival of our berry crop.  And while we’ve been picking for two weeks now, it was not until yesterday that we could see a significant ripening of the fruit. So at the very last minute, we made the “oh hot damn, we have a lot of berries” call and opened our PYO STRAWBERRY fields to the community.  However, we gotta be candid here- our early varieties are not ideal.  While the fruit is plentiful, the berries are smaller than what you are historically used to picking from our fields.  Many factors play into this reduced crop: Asian Garden Beetle, root disease, winter injury, a super wet Summer in 2021, etc… Honestly, it’s a total bummer and we’ve talked about bush hogging the early fruit many times.  BUT, what is JUNE without berries? What is the solstice without red stained fingers?  

We can’t give up on this early crop just yet… so the fields are open and ripe for the picking daily, 8am-1pm.

And for those that choose to wait a bit on PYO, we do believe the mid to late season varieties are looking good.  

All that said, CSA fam, I think it's important as we go on this picking and eating journey together to know about crop failure.  We have the next 16 weeks of CSA.  Which means a whole season of some crops going really well (beautiful and abundant harvests!) and some crops being total duds (think bug damage, rot, etc…).

But that’s farming for ya.  

Regardless, do as you do in June, and devour/shortcake/jam every strawberry that comes into arms reach.

For the season is fleeting!

PRO-TIPS:

Garlic scapes: Have you grilled yours yet?  DO IT.  Smear with olive oil, salt and pepper, throw on the grill until charred, eat immediately.

Big beautiful basil bunches: Make more pesto or toss into salads/stir fries! 

The biscuit topping includes the curious ingredient of hard-boiled egg yolks. I’ve been trying for days to find the reason behind it’s inclusion (as I am sure someone will ask) but without my cookbooks still boxed up, my access to technique information is limited. I know that some people grind up a hard boiled yolk in their sables, to make them sandier and would argue that this makes the biscuits a little richer and cakier. Whether that’s the official rationale behind it or not, however, I don’t care — this will be the only biscuit topping I use for now on. It is perfect. I never should have doubted it.

As for the dish together, the one note I’d add is that the proportion of biscuit to fruit is actually quite high. Now I know this sounds like a dream come true for a lot of people, but should you like a little more fruit with your cake, simply double the fruit quantity below, or halve the topping.

For dough

1 2/3 cups all-purpose flour

3 1/2 tablespoons sugar

1 tablespoon plus 1/2 teaspoon baking powder

2 hard-boiled egg yolks

1/8 teaspoon salt

6 tablespoons cold unsalted butter, cut into 1/2-inch cubes

2/3 cup plus 1 tablespoon heavy cream

For rhubarb

2 pounds rhubarb, trimmed and cut into 1/2-inch pieces (about 6 cups)

1/2 cup sugar

1-inch piece of vanilla bean, split lengthwise, pulp scraped

2 tablespoons cornstarch

1 tablespoon turbinado sugar

In the bowl of a food processor, combine the flour, sugar, baking powder, egg yolks, and salt. Pulse to combine. Add the butter and pulse until the flour resembles coarse meal. Add 2/3 cup of cream and pulse until the dough comes together. Turn the dough onto a lightly floured surface and gently pat it together, incorporating any stray crumbs.

Using a small ice cream scoop or a large spoon*, form the dough into 2-inch balls, then flatten them slightly into thick rounds. Chill for 20 minutes (and up to 2 hours). Preheat oven to 350 degrees. Put the rhubarb in a shallow 21/2- quart casserole dish and toss with sugar, vanilla, and cornstarch. Allow to macerate 15 minutes.

Arrange the biscuit rounds on top, leaving about an inch between them. Brush the biscuits with cream and sprinkle with turbinado sugar. Bake the cobbler until the rhubarb is bubbling and the biscuits are golden brown, about 40 to 45 minutes. Serve with ice cream or crème fraîche.

* I haven’t unearthed my scoops yet, but I did find some cookie cutters, so I simply patted my dough out on a floured surface and cut them instead. Besides, who doesn’t like flower-shaped biscuits?

As for all the other crops included in this pick-list,

welcome to salad season!

The following are some standby combos and quasi recipes I hold onto to brighten up all these greens for eating:

  1. Rice noodle bowls!  Perfect vehicle for every green thing. Just add coconut aminos or tamari and sesame oil.  For protein you will have to look elsewhere- but as for the basil, scallions, lettuce, celery - just chop and fold in.

  1. GARLIC SCAPE PESTO SALAD DRESSING: Remember all that garlic scape pesto you made last week (and may or may not be sweating out rn)? Take a couple of tablespoons of that and add the following: olive oil, vinegar, maple syrup, and lemon juice. Everything to taste- whisk to combine.  

CSA WEEK 1: June 15th

p i c k l i s t

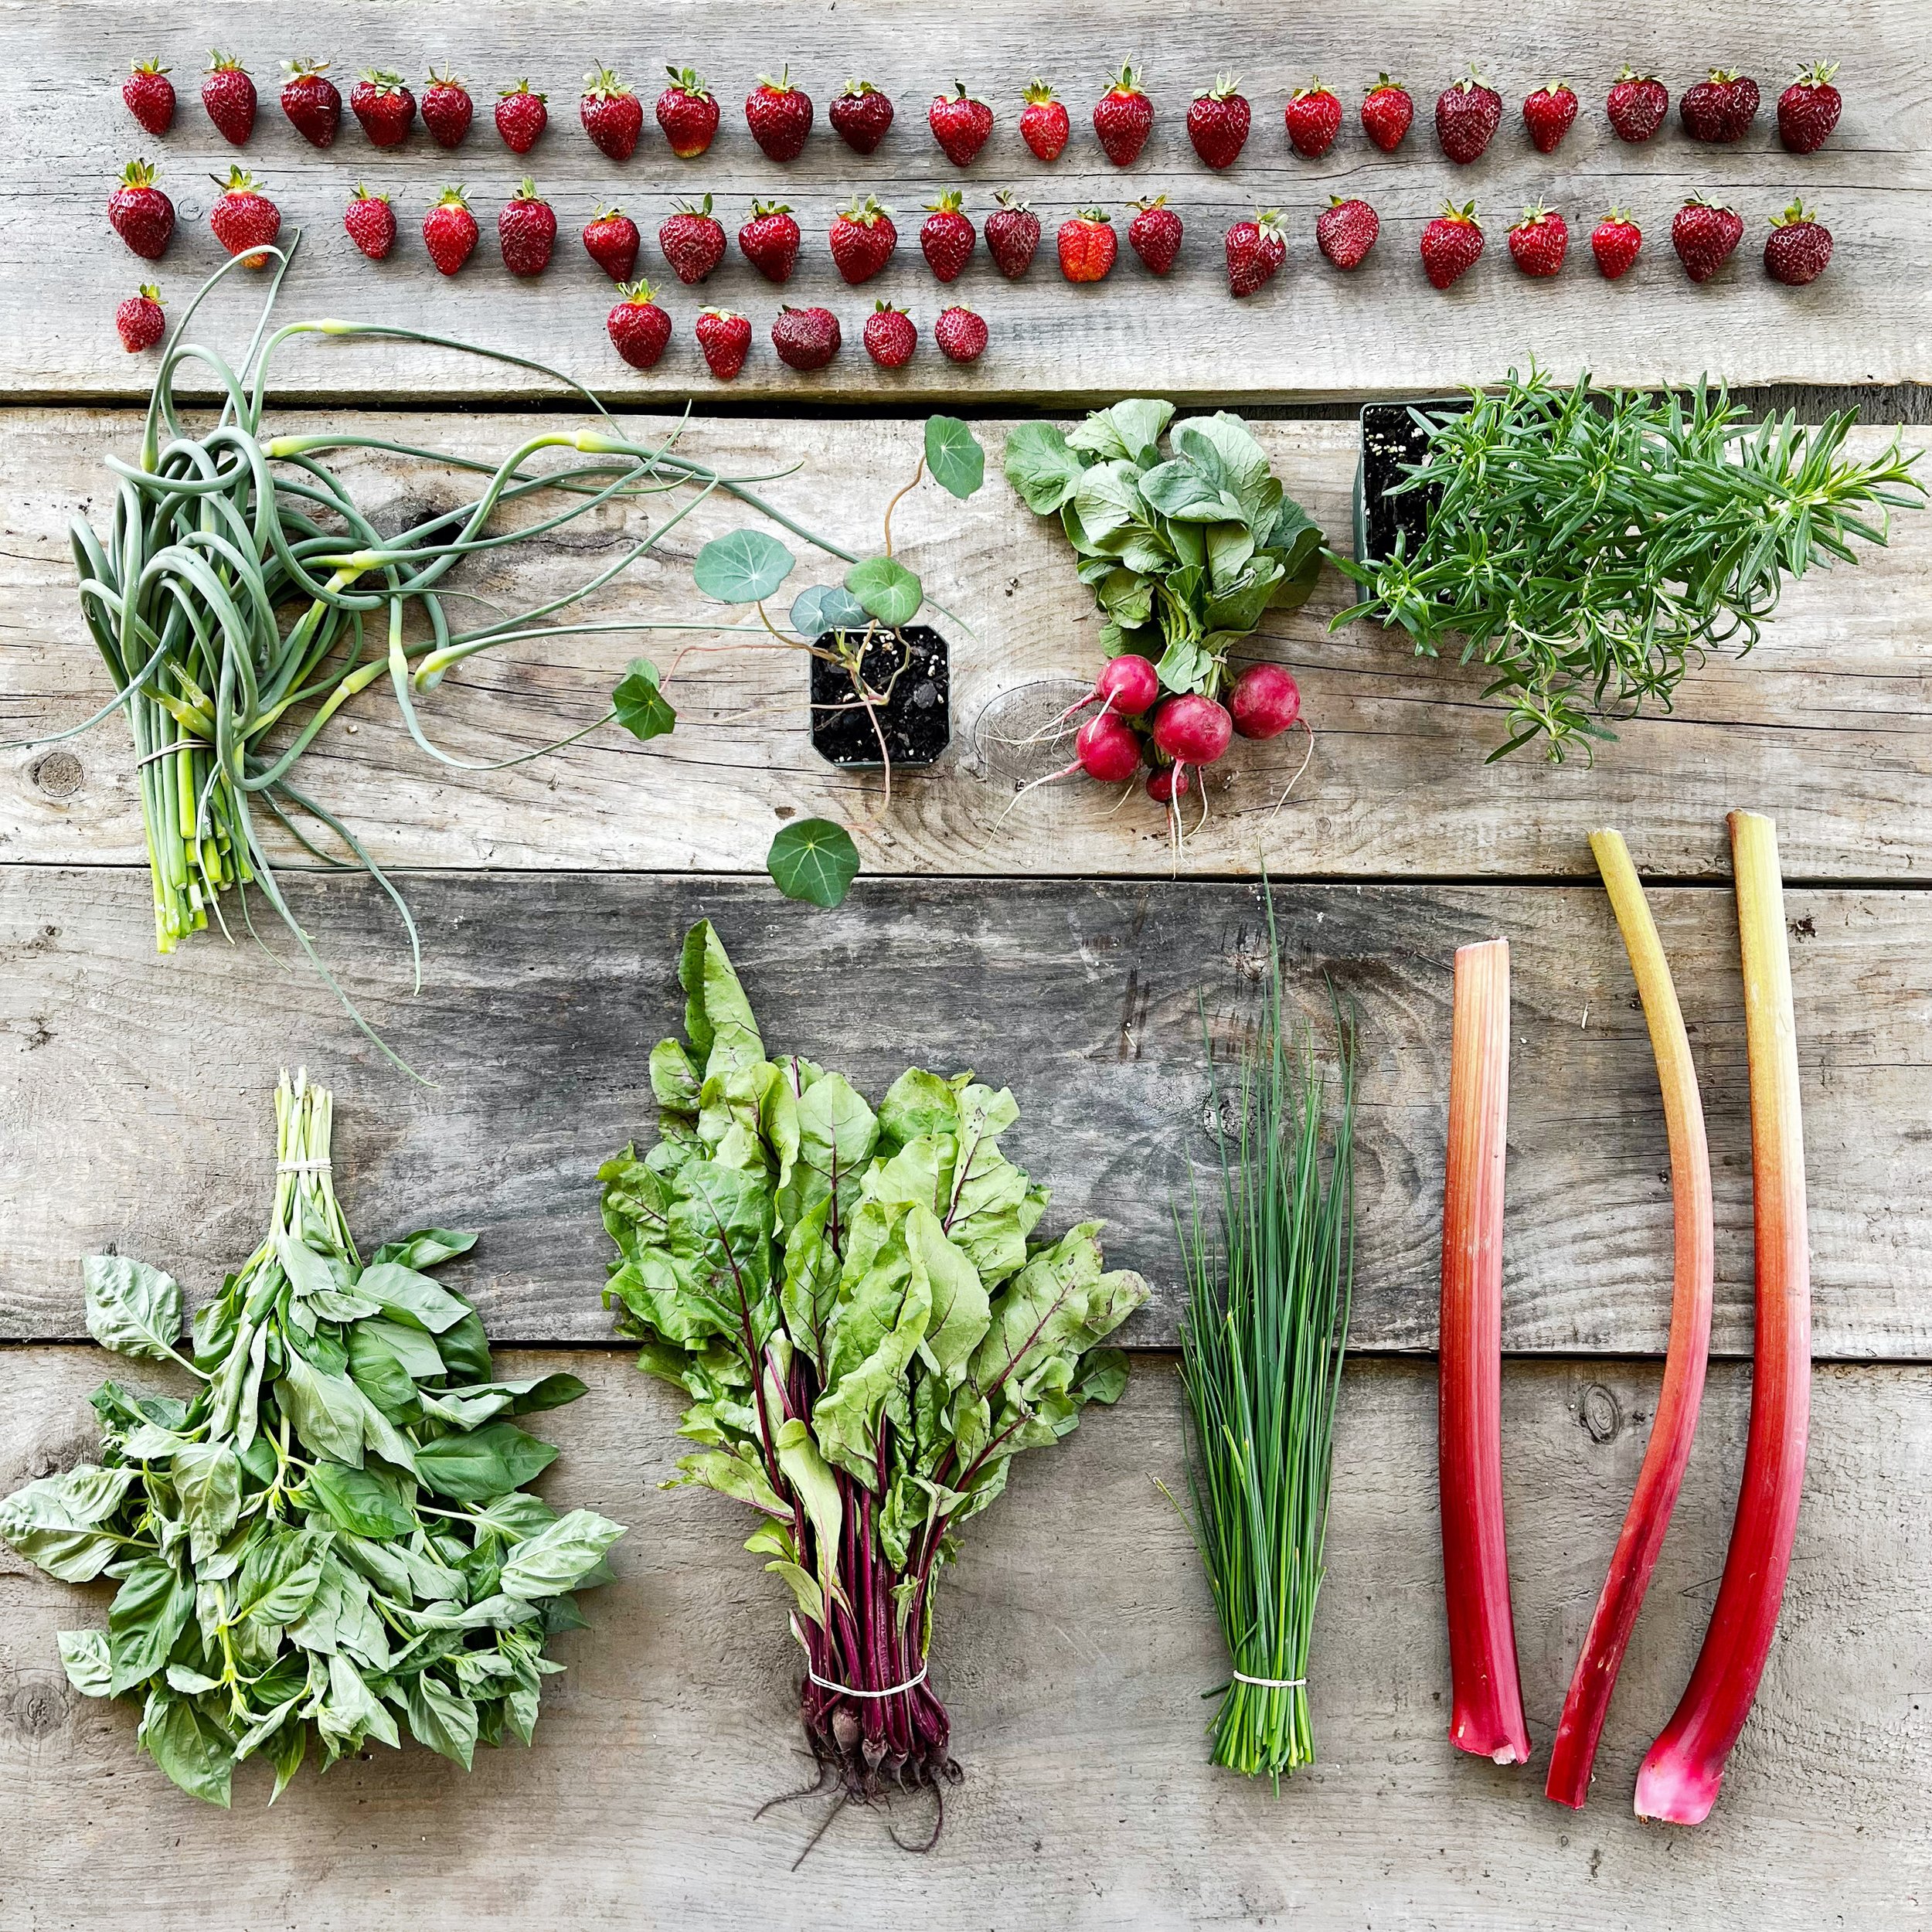
POTTED ROSEMARY - POTTED NASTURTIUM - BIG BEAUTIFUL  BASIL - GARLIC SCAPES - BEET GREENS - CHIVES - RHUBARB - RADISH - STRAWBERRIES

FARM NOTES:

Welcome back CSA friends and fam, old and new!  While I am so jazzed to get this party started, I got to be honest with yall, the fields are not ready for big harvests.  Prepping for this week really feels like a game in “make a little something out of nothing.”  The past month has been an absolute mess with many people getting sick (covid), and said people taking very necessary time away from the farm.  Therefore there was a big delay in crop planting/seeding because as it turns out Ray, Garnet, Strong, Pam, Claire and I (the ones on field crew that escaped the vid) can not seed, prep fields, and plant by ourselves. We were down 6 farmers out of 12 on field crew.  OOOOPH! What a Spring!  

Thus we are totally leaning into our perennial, over-wintered crops and greenhouse plants to pick and eat this week.  In particular, I am depending on this spectacular potted rosemary and glorious rhubarb to distract you from noticing the lack of lettuce and the missing cucumber.  Oh and please allow me to distract you once more and reintroduce you to an old friend: the beet green. 

Back when Anne and Pooh started this farm (48 years ago when dinosaurs roamed the earth) beet greens were the fan favorite.  Anne reports, “we used to sell bushels and bushels of beet greens in the beginning.”  This is kind of hard to believe with kale, and spinach taking center stage in more recent years.  Pooh continues, “Literally.  A normal day at the stand in the 80’s would be 3 to 5 bushels of bundled beet greens and the same with red radish.  Days prior to arugula, greens and salad mixes.”  

To really drive this point home about beet greens, the timeless classic, when George (Edgewater’s beloved 91 year old tractor driver) inquired about CSA this week, there was an obvious pep in his step when he found out beet greens made the list.  

Also, Sarah was pumped, and she was born an old soul :)

Personally it’s hard to lean into the beet green when I’ve been spoiled by arugula and baby greens, BUT, these beets greens are beautiful and perfect and tender and are going to make you forget you ever tried kale (maybe?).

Another extremely important note about the beet green before we move into recipes: beet greens are the predecessor to the beet.

Lastly, hello strawberry season, let’s dig in!

PRO-TIPS:

Rosemary rhubarb jam

from edible new hampshire

https://ediblenewhampshire.ediblecommunities.com/recipes/rosemary-rhubarb-jam

JENNY’S NOTE: This jam is my actual fave. This recipe also includes notes for canning- but if you rather eat immediately, then cool and refrigerate for all your Summer toast and crackers.  Also, when you fall in love with this jam and finish your own supply, please know that our kitchen makes and stocks this jam in the cooler at the farmstand to sell all Summer long (or until it runs out). 

RECIPE: In a large-sized, non-iodized pot combine rhubarb, sugar, rosemary, and lemon juice. Stir to make sure sugar coats everything. Set aside for 30 to 45 minutes.

 Heat pot over low-medium heat and bring to a simmer. Simmer for 7 to 10 minutes, until rhubarb has broken down.

Boil for an additional 2 minutes. Add lemon zest, and remove rosemary.

 To process in a hot water bath:

Ladle jam into hot sterilized jars leaving approx. ¼ inch headspace.

Wipe rims, apply lids and rings (finger tight).

Process in a hot water bath for 10 minutes.

Remove jars from the canner, let cool atop a folded towel on the counter for 12-24 hours.


ALRIGHT LET’S GET INTO THOSE GARLIC SCAPES:

What are they?  For you fresh CSA babes, the garlic scape might be a mystery crop, but let me tell you there is magic in those green twisty wands.  Garlic scapes grow out of the garlic plant.  They are the eventual flower that the garlic would naturally produce.  However, we cut them back in order to make a more robust garlic bulb.  Plants use a ton of energy to make flowers.  When you cut back your flowers, or prune your trees, it might feel disheartening at first (if you know you know).  For example, in my own garden, I go through each of the early blossoms and snip back the flowers. We try to do this in our cut flower field as well.  This encourages all that good energy that goes into producing flowers to be redirected into the foliage of the plants and its roots, encouraging a stronger, more productive plant over the growing season.  However, unlike pruning your tomato plants or apple trees, we get to eat the ‘cut back’ flower right now.  For all you medicinal foodies, there are real benefits to eating garlic scapes: immune system support, reduce inflammation, vitamin C, antioxidant properties, etc. The garlic scape is a more mild garlic that can be chopped fresh, fried on the pan, grilled with olive oil & salt (SOOOOO GOOOQOOOOD YOU HAVE TO TRY IT) or pestoed.  To move through and enjoy lots of garlic scapes all year long, make a ton of pesto, and freeze! 

GARLIC SCAPE PESTO:  YIELD About 1 cup recipe from the NYTimes

JENNY’S NOTE: No real measurements here, everything is to taste.

The star of this pesto is the garlic plant’s under-appreciated second offering: the fleeting garlic scape. The ingredients are straightforward except for the substitution of sunflower seeds for pine nuts. The seeds are a fraction of the cost and do the job just as well. A food processor is a must for this recipe. For pesto, ingredient order matters. Start with the scapes and process for about 30 seconds. Add the seeds until they are broken down and mixed well with the scapes. Scrape the sides of the bowl with a rubber spatula for wandering bits. Next, pour in the olive oil. If you have Parmesan cheese in chunks, add it now, but if it is grated, wait until the scapes and seeds smooth out. If you’re serving right away, add the basil and lemon juice. If not, hold back on the basil for now — otherwise the pesto will lose its vibrant color. Add generously to cooked spaghetti or spread on crusty bread.

INGREDIENTS

  • 1 cup garlic scapes, sliced crosswise (about 10 to 12 scapes)

  • ¼ cup raw sunflower seeds

  • ½ cup extra virgin olive oil

  • ¼ cup Parmesan cheese

  • ½ cup basil leaves

  • Juice of one lemon

    PREPARATION

  1. Place the garlic scapes in a food processor and pulse for 30 seconds.

  2. Add the sunflower seeds and pulse for 30 seconds. Scrape down the sides of the bowl.

  3. Add the olive oil and process on high for 15 seconds.

  4. Add the Parmesan cheese and pulse until the ingredients are combined.

  5. Add the basil and lemon juice, and process until reaching the desired consistency.

  6. Add salt to taste and serve immediately.

BEET GREENS:

Eat fresh- chopped like a salad, dressed with your favorite dressing and topped with stinky, salty cheese (feta, blue cheese, etc…)

Or cooked into anything where greens get cooked (eggs/ spaghetti/ curry/ etc…)

RADISHES:

SLICE IN HALF, SMEAR WITH BUTTER, SPRINKLE WITH SALT… DEVOUR 


STRAWBERRIES:

needs no recipe, you know what to do.

FALL CSA WEEK 7!! WOOT WOOT!

p i c k l i s t

WINTER SQUASH - POPCORN - CILANTRO OR SAGE - ROSEMARY - PARSLEY - CELERIAC - RUTABAGA - POTATOES - CARROTS - SWISS CHARD - LETTUCE - HOT PEPPER - GARLIC - BRUSSELS SPROUTS - ONIONS - SHALLOTS

BREAD SHARE: FROZEN PIZZA DOUGH

Shoot yall, there are too many recipes out there for all this veg!  I didn’t even begin to go down the new gremolata on everything path I’m on and yet I still managed to fill this double-sided sheet with mostly PRO TIPS and very little room for a send off letter.  But to hit on the most important points from the CSA eating season Summer through the Fall, we’re going with the following bullet points:

  1. The Monday-Wednesday & sometimes Saturday CSA picking, planting, packing superhero angels include the following: Allie, Mrs. T, Kayleigh, Roy, Mike, Ray, Garnet, Strong, Ramone, Tim, and Jasper.  You hear from me the most because I am most certainly the loudest, but holy smokes it takes an actual village to bring forth these crops to the table weekly.  

  1. Grandparents on site is the other only way that this CSA exists.  As this farm ages and our lifestyles and life cycles evolve, kiddos without a doubt have a role here.  But sometimes they need to be fed and bathed and clothed and hugged and read to and sometimes we don’t have enough arms to simultaneously make 250 bunches of swiss chard and wipe butts (and i’m pretty sure that would be a food safety violation) and bottomline here, thank god for Grannie Annie (Anne Sprague) and this very accepting of all ages multi-generation farm.  

  2. You are all right, there was not enough cabbage this year, (cue milli vanilli’s blame it on the rain)

  3. I’ve said it before, I’ll say it again with my full heart: I LOVE PICKING VEGETABLES FOR YOU ALL.  Somehow, each and everyone of you are the kindest and most supportive eaters of the crops we grow.  Also noteworthy, the last CSA always leads into Thanksgiving which really drives the point home how Thankful I am to each of you. 

PRO-TIPS:

full disclosure these recipes are not harvested from my own searching and testing… I reached out to my extremely talented and trusted kitchen witch friend about PRO-TIPS this week using the pick-list from this week’s CSA as her guide, and this is what she offered:

Swiss Chard: 

swiss chard sauteed in olive oil and garlic can’t be beat. But for all those people who need to be

extra, here are some other things you can add to finish:

  • - parmesan or feta or goat cheese

  • - toasted or candied nuts or pumpkin seeds

  • - balsamic vinegar

  • - bacon or pancetta

what I'm going to do with the shallots...

I'm going to do what Queen Samin taught me on how to make southeast asian style fried shallots - the rest of the video is pure gold as well… for video head here:

FOR THE POTATOES: 

I'm making mine whipped in the instant pot to free up burner space. There are lots of recipes for this. I'm using the following recipe, and replacing the sour cream and milk with buttermilk (“I’m” being my kitchen witch friend, not me jenny):

Instant Pot Mashed Potatoes

Instant Pot Mashed Potatoes are rich and creamy and so easy to make!  Making mashed potatoes has never been quicker or tasted better than these Instant Pot mashed potatoes ready in 20 minutes!

3 Pounds Potatoes 6 medium, Peeled and Sliced

Water to Cover Potatoes About 4-5 cups

2 Teaspoons Salt Divided

¼ Cup Butter

¼ Cup Sour Cream

¼ Cup Milk

½ Teaspoon Garlic Powder

½ Teaspoon Pepper

  1. Place the peeled and sliced potatoes into the bottom of the instant pot.

  2. Cover with water and add 1 teaspoon of salt.

  3. Place the lid on the instant pot and set the valve to seal.

  4. Cook on manual pressure for 8 minutes.

  5. When the timer goes off, turn the instant pot off.

  6. Quick release the pressure from the pot.

  7. Drain the potatoes and return to the instant pot.

  8. Add the remaining salt, pepper, garlic powder, butter, milk and sour cream to the potatoes. Mash until smooth.

  9. Serve topped with parsley if desired.

 NOTE:  This recipe can be doubled in a 6 or 8 quart instant pot.

NOTE:  There is no need to cut the potatoes into small chunks.  Slice each potato into large rounds (about 4-5 rounds per potato).

For the yellow onions:  

Serves: 8 to 10/  Hands On Time: 45 minutes/  Total Time: 1 hour and 45 minutes

 8 tablespoons (1 stick) unsalted butter, plus more for greasing

3 1/3 cups coarsely chopped Vidalia onions

Salt and freshly ground black pepper

2 cups plus 2 tablespoons long-grain white rice

1 cup heavy cream

1 cup grated Swiss cheese

3 tablespoons minced fresh parsley  

Sweet paprika

 Heat the oven to 325 degrees. Generously butter a 9- by 13-inch baking dish.

In a large skillet, melt the butter over medium heat. When the butter is foamy, add the onions and a generous pinch of salt. Cook, stirring occasionally, until softened, deeply golden brown and caramelized, about 30 minutes.

Meanwhile, bring a large pot of heavily salted water to a boil. Add the rice and boil for 5 minutes. Drain well.

When the onions are caramelized, remove from the heat and stir in the cream and cheese until the cheese is melted. Stir in the rice and parsley, and season with salt and pepper. Transfer to the prepared baking dish and sprinkle with paprika.

Bake until the casserole is browned and the top is crisp, about 1 hour. Serve hot.

 FOR THE BRUSSELS:  

 YIELD: 6 SERVINGS    PREP TIME: 15 MIN     COOK TIME: 25 MIN 

1. To prepare the roasted Brussels sprouts: Preheat your oven to 400ºF (200ºC). Trim the bottom of the Brussels sprouts, and slice each Brussels sprout in half, top to bottom. Prepare a large baking sheet (you can line it with parchment paper if you like).

2. Pat the Brussels sprouts dry with paper towels and place them in a large bowl. Add olive oil, Italian seasoning, garlic, Parmesan, salt, and pepper. Toss gently to coat the Brussels sprouts evenly.

3. Place the Brussels sprouts on the prepared baking sheet, spreading evenly into one layer. Bake the parmesan Brussels sprouts on the center rack for 25 to 30 minutes – Adjust the time depending on your oven, the vegetables should be golden brown.

4. Transfer the parmesan roasted Brussels sprouts to a large serving bowl and sprinkle with fresh chopped parsley if you like. Enjoy!

FALL CSA WEEK 6

P I C K L I S T

DELICATA WINTER SQUASH - RED KALE - CILANTRO - DILL - SWEET POTATO - BEETS - LEEKS - 

HEIRLOOM TOMATOES - CARROTS - CELERY - MIXED GREENS - WATERMELON RADISHES

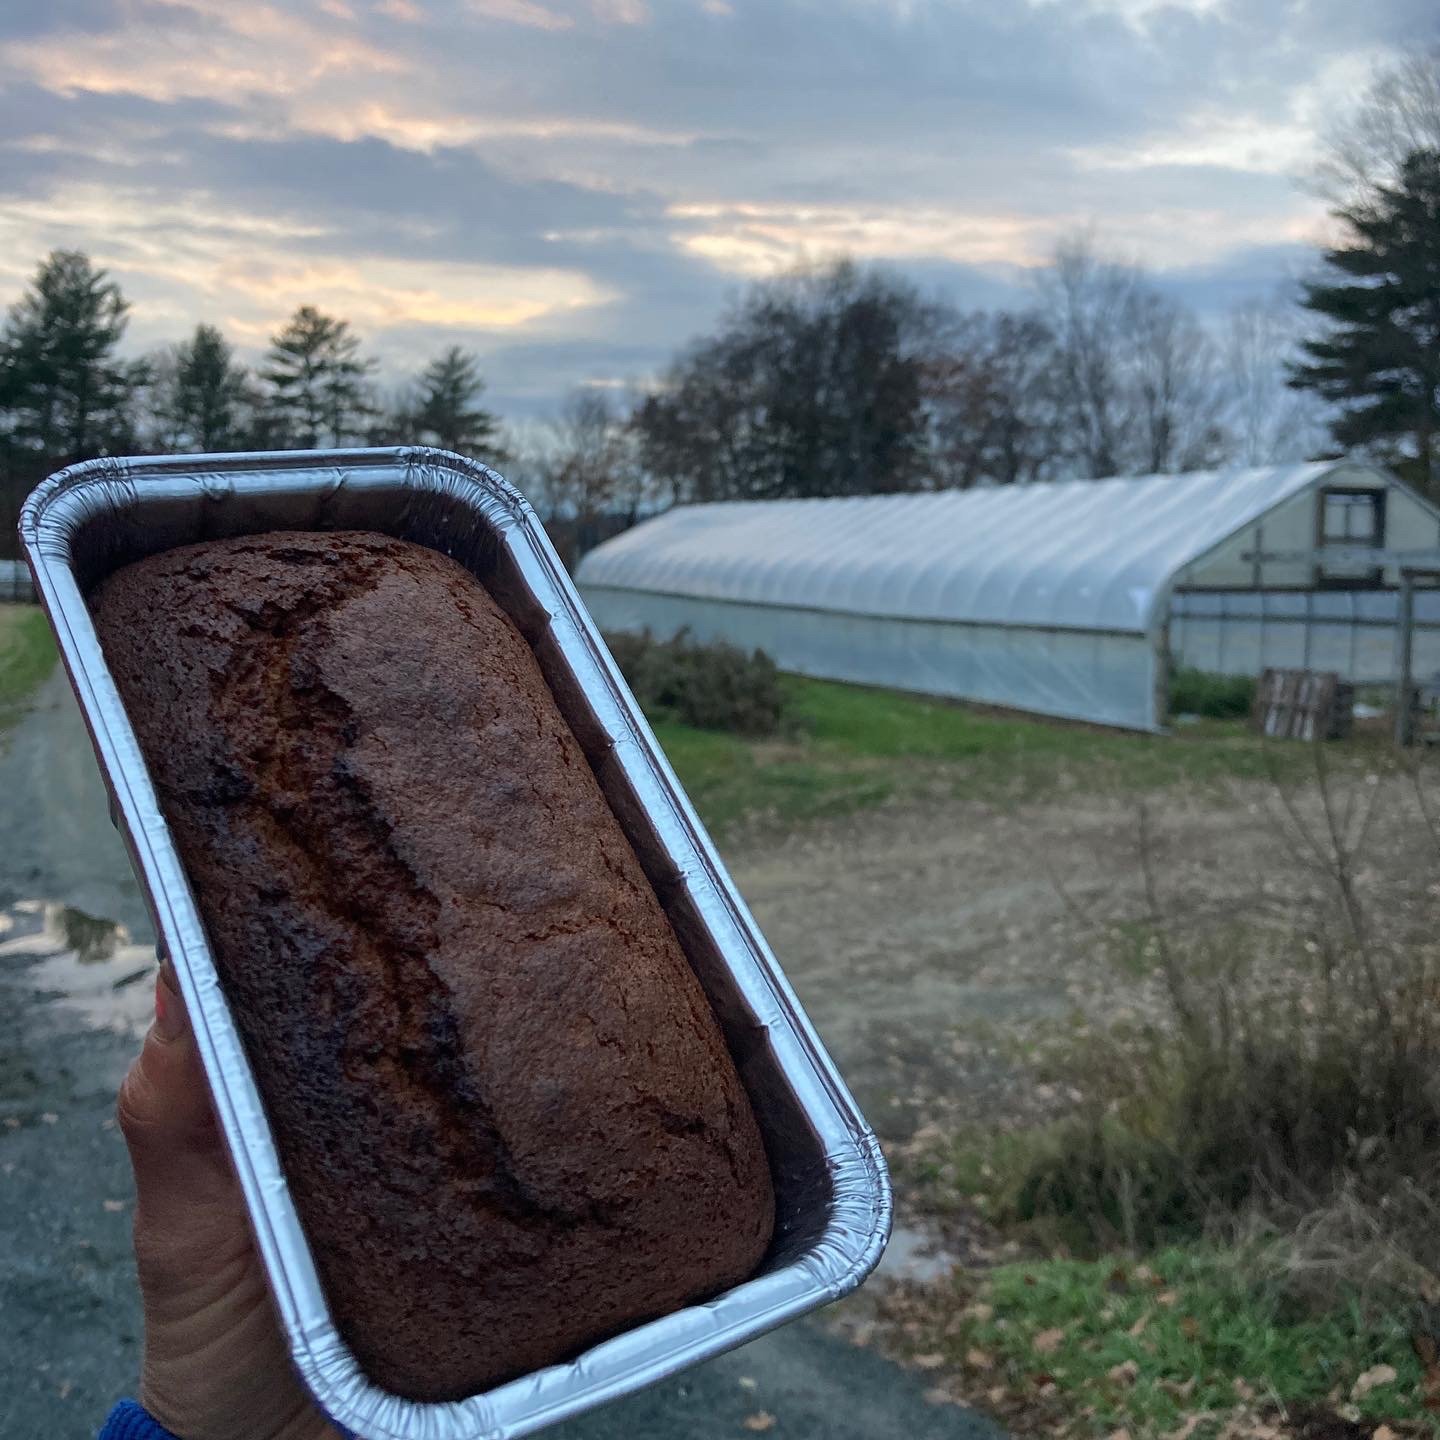
BREAD SHARE: QUICK PUMPKIN BREAD

Tomorrow, when you wake up, the majority of our crew will be boarding flights to Jamaica and heading south for far greener terrain.  Oh goodness, we could not do what we do without this team of farmers!  Garnet, Jasper, Ramone, Strong, and Roy keep the farm moving with such seamless momentum.  We are so grateful to each and every one of these guys for choosing to spend the New England growing season with our farm and family and share their knowledge and expertise with us. They each provide something unique to the crew- be it Roy’s jokes, Ramone’s song, Garnet’s knowledge, Jasper’s determination, Strong’s sweet spirit- and that is barely scratching the surface.  

However, the weather has turned, all of our fingers are officially freezing in the fields, and the curried goat and oxtail soup are calling.  Therefore, it’s time to wrap it up, fly South, take a break and hug family. 

The skeleton crew will take over the packshed and the fields starting Thursday and it'll be good, but it won’t be the same…

PRO-TIPS:

Lilya’s Sum­mer (but terrific warmed in winter) Beet Borscht

This beet borscht is per­fect served chilled on sum­mer days or served hot in the cold­er months. The ide­al borscht, writes Alek­san­dar Hemon in The New York­er of his Bosn­ian fam­i­ly tra­di­tions ​“con­tains every­thing … and it can be refrig­er­at­ed and reheat­ed in per­pe­tu­ity, always bet­ter the next day. The cru­cial ingre­di­ent is a large, hun­gry fam­i­ly, sur­viv­ing togeth­er.”. ...And while this recipe calls for roast­ing beets and adding them to the soup, it also tastes great with­out roast­ed beets. Just cut the beet amount to 1 pound if omit­ting the roast­ing step.

2 pounds whole beets, scrubbed but unpeeled

2 car­rots, unpeeled and coarse­ly chopped

2 cel­ery stalks with leaves, coarse­ly chopped

2 medi­um onions (leeks work great here as well!): 1 quar­tered, 1 diced

5 gar­lic cloves: 2 left whole, 3 minced

2 dried bay leaves

2 table­spoons kosher salt

2 table­spoons whole black peppercorns

2 table­spoons car­away seeds

4 cups cold water

2 table­spoons olive oil

3 table­spoons honey

3 table­spoons apple cider vinegar

Sour cream, store-bought or home­made (see page 24), or crème fraîche, for garnish

Chopped fresh dill, for garnish

  1. Pre­heat the oven to 400°F. Wrap 1 pound of the beets indi­vid­u­al­ly in alu­minum foil and set on a bak­ing sheet. Roast until they can be eas­i­ly pierced with a fork, 40 min­utes to 1 hour, depend­ing on the size of the beets (larg­er beets take longer). The skin should peel off eas­i­ly under cold run­ning water. Dice the beets into bite size pieces and refrig­er­ate until serving.

  2. While the beets are roast­ing, in a large soup pot, com­bine the remain­ing 1 pound beets, the car­rots, cel­ery, quar­tered onion, whole gar­lic cloves, bay leaves, salt, pep­per­corns, car­away seeds and 9 cups water. Bring to a boil, then reduce the heat to low and sim­mer for 1 hour. Remove from the heat.

  3. Fill a large bowl with water and ice. Remove the boiled beets from the pot and place them in the ice-water bath. When cool, peel and coarse­ly chop them. Strain the broth through a fine-mesh strain­er into a large bowl, dis­card­ing the solids.

  4. Rinse and dry the soup pot and set it over medi­um heat. Add the olive oil and diced onion and sauté until the onion is fra­grant, about 3 min­utes. Add the minced gar­lic and sauté for 3 to 5 min­utes more, until the onion begins to turn gold­en. Add the beet broth and coarse­ly chopped boiled beets to the pot and sim­mer over low heat, cov­ered, for about 20 minutes.

  5. Remove from the heat and puree the soup in the pot using an immer­sion blender. (Alter­na­tive­ly, trans­fer it in small batch­es to a stand­ing blender and puree — just be care­ful!) Add the hon­ey and vine­gar and sim­mer over very low heat for 5 minutes.

  6. If serv­ing hot, place 2 table­spoons of diced roast­ed beets in the bot­tom of each bowl and then ladle the hot soup over them. Gar­nish­ing with sour cream and chopped fresh dill. If serv­ing chilled, remove from the heat and let the soup cool com­plete­ly and then refrig­er­ate overnight. Be sure to stir the soup well and taste imme­di­ate­ly before serv­ing. Once cooled, many soups require a touch more salt. If nec­es­sary, add more salt, a tea­spoon at a time. As with hot borscht, place 2 table­spoons of the roast­ed beets at the bot­tom of the bowl and ladle the soup on top. Serve gar­nished with sour cream and chopped fresh dill.

Excerpt­ed from the book The Gefilte Man­i­festo by Jef­frey Yoskowitz & Liz Alpern. Copy­right ©2016 by Gefilte Man­i­festo LLC. Reprint­ed with per­mis­sion from Flat­iron Books. All rights reserved. Pho­tog­ra­phy by Lau­ren Volo.

Vinegar and Honey-Roasted Beet with Labneh

  Yield: 4 Servings

Roasted Beets

  • 6 small beets (or 2-3 big ones) 

  • 3 tablespoons red wine vinegar

  • 3 tablespoons honey

  • 3 strips of orange zest

  • 1 teaspoon coriander seeds

  • 1 teaspoon kosher salt

    KALE Gremolata

  • ¼ cup finely chopped kale

  • ¼ cup chopped fresh parsley (use last weeks! Or wait until next week when there will be more parsley bunches for all!)

  • 1 small garlic clove, grated

  • Grated zest of 1 small or ½ large orange

  • 3 tablespoons extra-virgin olive oil

  • 1 tablespoon red wine vinegar

  • 2 teaspoons honey

  • ½ teaspoon kosher salt

    Serving

  • 1 cup labneh, store-bought or homemade (if you don't have labneh on hand, use thick green yogurt)

  • Sumac (if you don't have sumac, it's ok, this will still be delish!)

  • Pita or any flat bread

  • Roast the beets: Preheat the oven to 350°F.

  • In a large bowl, combine the beets, vinegar, honey, orange zest, coriander seeds, salt, and 1 tablespoon water. Toss to coat. Arrange the beets on a rimmed baking sheet and cover the tray tightly with foil. Roast until the beets can be easily pierced with a knife, about 45 minutes. I like to wait until almost all the liquid has evaporated and you get to roll the beets around in the sticky juice that forms on the bottom. Roast for another 5 minutes until the skin caramelizes and forms an almost candied shell. Once the beets are cool enough to handle, cut them into 1-inch-thick wedges. 

  • Make the gremolata: In a medium bowl, combine the kale, parsley, garlic, and orange zest. Mix gently to combine. Dress the mixture with the olive oil, vinegar, and honey, season with the salt, and toss until evenly coated.

  • To serve: In a large bowl, combine the beets and gremolata and toss to coat. Spread the labneh on a platter and place the dressed beets on top, including any juices that have accumulated in the bowl. Add a sprinkle of sumac and serve with flatbread.

FALL CSA WEEK 5

- P I C K L I S T -

 BOK CHOY - CELERY - CHIVES - SWEET POTATO - BRUSSELS SPROUTS - HEIRLOOM TOMATOES - 

RED ONIONS - CARROTS - DAIKON - RADISHES - PARSLEY - GARLIC - FLOWERS - PEPPER

BREAD SHARE: AUBERGINE BREAD

Here we are on week 5 of our Fall CSA which in truth is week 22 of our overall CSA growing season.  It’s been 22 weeks of growing, weeding, harvesting, organizing, google-sheeting, emailing, back to harvesting, etc…  In all this movement towards producing a variety of veg each week that is both abundant in the fields and eat well together, I’m not sure if i’ve made mention of the CSA fairy, Mrs.T.  

Mrs T, (Cherrie Torrey) is the very first Edgewater Farmer greet to each and everyday.  She consistently wakes well before first light and moves through the fields and the packshed- crossing off lists well before anyone has a chance to notice.  I like to think she’s made friends with the lingering nocturnals.  The owls greet her as if she is one of their own (both so wise) and the skunks must have an understanding with her as well (because we all know not to mess with Mrs. T).  Mrs.T is of the most dependable humans I’ve ever known.  She is the reason why the herbs have been so plentiful and lovely (for the past 22 weeks!).  Mrs. T’s proximity to the farm- basically next door neighbor- allows her to hit the fields in the heat of the summer before the scorch of the sun has made it overhead.  And in the Fall when so many of us are moving through the pack-shed to fill orders- she gets there first, bags the sweet potatoes or greens- so as not to clog up the scale and bagging station- and by the time the crew shows up around 7 or 8, she is gone back to her home to start her own day, often leaving a plate of brownies or blueberry buckle behind for all to share in her wake.  All this, only solidifying her actual fairy status in the Edgewater Farm books.  Thank-you Mrs. T.  

PRO-TIPS:

Brussels sprouts: the cooler temps with multiple nights below freezing have sweetened the brussels to absolute perfection. If you have no space to store your brussel wands, they are totally fine kept in a cool place until you are ready to devour.  For example, I currently have a few hanging out in the shade of my front porch.  And in the past they’ve wintered just fine (for a week or so) in the garage.  

 1½ lb. brussels sprouts, trimmed, halved

¼ cup extra-virgin olive oil

½ tsp. kosher salt, plus more

Freshly ground black pepper

¼ cup honey

⅓ cup sherry vinegar or red wine vinegar

¾ tsp. crushed red pepper flakes (optional)

3 Tbsp. unsalted butter

3 scallions, thinly sliced on a diagonal

1 tsp. finely grated lemon zest

Preparation

Step 1

Place a rimmed baking sheet on bottom rack of oven; preheat to 450°. Toss brussels sprouts and oil in a large bowl; season with salt and black pepper.

Step 2

Carefully remove baking sheet from oven. Using tongs, arrange brussels cut side down on baking sheet. Roast brussels on bottom rack until softened and deeply browned, 20–25 minutes.

Step 3

Meanwhile, bring honey to a simmer in a small saucepan over medium-high heat. Reduce heat to medium-low and cook, stirring often, until honey is a deep amber color but not burnt (it will be foamy, that’s okay), 3–4 minutes.

Step 4

Remove from heat and add vinegar and red pepper flakes, if using, and whisk until sauce is smooth (it will bubble up quite aggressively when you add the vinegar before settling). Return saucepan to medium heat, add butter and ½ tsp. salt, and cook, whisking constantly, until glaze is glossy, bubbling, and slightly thickened, 3–4 minutes.

Step 5

Transfer brussels sprouts to a large bowl. Add glaze and scallions and toss to combine. Transfer to a platter and top with lemon zest.

 Your bag of sweets potatoes!

Yes this is a bag of unwashed sweet potatoes- this will help store them longer in case you are not committed to using them right away.  


Baechu (cabbage) kimchi

Sea salt

1 pound of chinese cabbage (napa or bok choy)

1 (or more) daikon radish 

A few red radishes

1 to 2 carrots (or more!)

1 to 2 onions and/or leeks and/ or a few scallions and/ or shallots

3 to 4 cloves of garlic (or more!)

3 to 4 hot red chilies (or more!), depending on how hot peppery you like your food, or any form of hot pepper (fresh or dried)

3 tablespoons grated ginger root

 PROCESS:

Mix a brine of about 4 cups (1 liter) of water and 4 tablespoons of salt.  Stir well to thoroughly dissolve salt.  The brine should taste good and salty.

 Coarsely chop the cabbage, slice the radish and carrots, and let the vegetables soak in the brine, covered by a plate or other weight to keep the vegetables submerged, until soft, a few hours or overnight.  Add other vegetables to the brine such as seaweed/ other cabbage/ broccoli/ cauliflower/ brussel sprouts/ peppers/ etc

 JENNY’S NOTE: I consider this the ideal recipe to clean out my fridge- its the fermented form of everything but your kitchen sink soup.  All vegetables (other than potatoes) are welcome here. 

 Ok, back to the recipe: Prepare the spices! Grate the ginger, chop the garlic and onion; remove seeds from the chiles and chop or crush, or throw them in whole. Kimchi can absorb a lot of spice.  Experiment with quantities and don’t worry too much about them.  Mix spices into a paste.  (If you wish you can add fish sauce to the spice paste.  Just check the label to be sure it has no chemical preservatives, which function to inhibit microorganisms.

  Drain brine off vegetables, Reserving the brine.  Taste the saltiness.  You want them to taste decidedly salty but not unpleasantly so.  If they are too salty, rinse them.  If you cannot taste salt, sprinkle with a couple of teaspoons salt, and mix.

 Mix the vegetables with the ginger-chili-onion-garlic paste.  Mix everything togetherand stuff it into a clean quart-size (liter) jar.  Pack it tightly into the jar, pressing down until brine rises.  If necessary, add a little of reserved vegetable-soaking brine to submerge the vegetables.  Weight the vegetables down with a smaller jar, or plate.  (JENNY’S NOTE: I make my kimchi in a crock, press the veg down until brine rise and the have a smaller plate on top to keep veg submerged under the brine and a big jar of water with lid on top to keep it all weighted down).  However you submerge your kimchi, cover the jar with towel or clean rag to keep dust and flies out.

  Ferment in your kitchen or other warm place.  Taste the kimchi every day.  After about a week of fermentation, when it tastes ripe, move it to the refrigerator.  An alternative and more traditional method is to fermbent kimchi more slowly and with salt in a cool pot, such as a hole in the ground, or a cellar or other cool place.  

FALL CSA WEEK 4

- P I C K L I S T -  

WINTER SQUASH - LEEKS - LEMONGRASS - RED CABBAGE - CILANTRO - GINGER - HEIRLOOM TOMATOES - BELL PEPPERS - POBLANO PEPPERS - REZHA MACEDONIA (HOTTIE) PEPPER - MINT - BROCCOLI - HABANADA PEPPERS - LETTUCE - POPCORN

BREAD SHARE: APPLE OATMEAL

Finally woke this morning to the world under a blanket of frost.  Oh goodness, we keep on talking about the eventual slow down that comes with said frost- but we have yet to really do so.  We still have carrots, watermelon radishes, etc in the ground waiting to be pulled and brussel sprout stalks - though I prefer to call them wands-  waiting to be cut.  We have some greenhouse skins (the plastic over the hoops) needing to be replaced and rolled up, and other greenhouses to be swept and tidied. Onions are waiting to be topped, chipped, and stored and the every-other day co-op pack out needs tending from now til January  At this point the only thing that truly brings this farm to an end of day halt is when it’s 30 minutes past sunset and - if harvesting carrots- you can no longer decipher between carrot and stick, and it is so very dark.  That's when it's time to go home and call it a day.  

 In other news this week, Holy smokes Anne Sprague the queen of Edgewater Farm turned 70 this week!  Did the math- girlfriend has been growing strawberries, flowers, plants, and a cornucopia of other veg since she was 23 years old.  47 years later, Anne is still pumped to pick and grow flowers every single day (until frost) while keeping this farm afloat.  You quite literally would not be getting a CSA from Edgewater without her presence in all of our lives and support of all the things we (the next generation) takes on.  Big Cheers to Anne for all she is and all she does! Woot! Woot! 

 Now go put on one more layer of wool, and come pick up your CSA share! 

 PRO-TIPS:

A new pumpkin laksa for a cold night by nigel slater from the book TENDER

THE FOLLOWING RECIPE, AND THE POTENTIAL FOR A WOOD FIRED SAUNA SHVITZ, ARE THE ONLY THINGS THAT EXCITE ME ABOUT TEMPS DROPPING

Enough for 4…

Pumpkin (aka winter squash!), unskinned

Cilantro and mint leaves to finish

 FOR THE SPICE PASTE:

3-4 hot peps

Garlic- 2 cloves

Ginger- a thumb sized lump

Lemongrass- 2 plump stalks

Cilantro stems+leaves- (a handful)

Sesame oil- 2 tablespoons 

 FOR THE SOUP:

Chicken or vegetable stock - 2 ½ cups

Coconut milk - 1 ¾ cups

Nam pla (thai fish sauce) - 2 tablespoons

Tamari - 1 to 2 tablespoons, to taste

Juice of a lime

Dried noodles - 3 ½ ounces, cooked as it says on the packet, then drained

 Peel and seed the pumpkin (or winter squash) and cut the flesh into large chunks.  Cook in a steamer or in a metal colander balanced over a pan of boiling water until tender.  Remove from the heat.

 For the spice paste, remove the stems from hot peppers, peel the garlic, and peel and roughly chop the ginger and lemongrass.  Put them all into a food processor with the cilantro and sesame oil and blitz until you have a rough paste.  

Get a large, deep pan hot and add the spice paste.  Fry for a minute, then stir in the stock and coconut milk and bring to a boil.  Let simmer for seven to ten minutes, then stir in the nam pla (fish sauce), tamari, lime juice, pumpkin, and the cooked drained noodles.  Simmer briefly, add the cilantro and mint leaves over the top and serve in deep bowls…

 REZHA MACEDONIA PEPPERS: 

This pepper is so rad and great for drying- read on for the write up about it in the Baker Creek Seed Catalogue: The name means “engraved.” Another local name, Vezeni Piperki, means “embroidered.” Both names refer to the curious lines on the skins of the tapering, long, thin peppers. The fruit, which ranges from mild to sometimes very pungent, is to be seen hanging in great clusters, drying in North Macedonian warm late autumn sun. This is an old traditional (heirloom!) variety grown almost exclusively in small villages and not on a large scale.

 How to Popcorn cobs 2 ways!!

First Way: (pretty much copy and pasted from https://www.bonappetit.com/story/how-to-make-stovetop-popcorn, but this is also the way i do it at home, so i know it checks out)

  1.  shuck corn and remove kernels. 

  2. You will also need cooking oil (extra-virgin olive oil and coconut oil is my fave, but peanut, canola, grapeseed, and vegetable will all work) and kosher salt. If you want to season it my way—which I highly recommend, though I'm obviously biased—go ahead and pick up a canister of nutritional yeast and some crushed red chili flakes (ideally Aleppo pepper, but you can make it happen with regular ones). The combination of these ingredients adds up to a cheesy-spicy flavor dust for the popcorn that challenges the dominance of Nacho Cheese Doritos.

  3. To make the popcorn, you need a cooking vessel with a lid that offers room to grow. The popcorn is going to multiply in volume dramatically, and it needs empty space to hurtle into. The lid keeps it from ricocheting all over your kitchen, although that is a fun party trick. You also want to use a pot with good heat conductivity. A large Dutch oven is ideal, but a heavy duty stockpot will do in a pinch.

  4. Grab your olive oil/coconut oil. For ½ cup popcorn kernels—a decent amount for 4 normal popcorn people or 2 insane popcorn eaters—add 3 Tbsp. of oil to the pan. Yes, it seems like a lot of oil, but without it, steam won’t build up in the pot, and without steam’s concentrated, moist heat, there will be no popping.

  5. Put the pan over medium heat, pour in ½ cup popcorn kernels, stir to coat with oil and keep stirring occasionally until the kernels start to sizzle. Put the lid on the pan and nudge the dial halfway between medium and medium-high. Don’t go anywhere! Soon, but not too soon, popping noises will emanate from the pot. After that’s been happening for a minute or two, pick up the pot with the lid closed and shake it up and down. This is to prevent the dreaded scourge of unpopped kernels—you’ll hear them clinking around in there. Let the popping continue, but if you see any tendrils of smoke escaping from under the lid, immediately lower heat to medium.

  6. When the pops have subsided to an eruption every couple of seconds, turn off the heat. Set the lid askew so that some steam can escape, because soggy pops are an abomination. After a minute of steam release, pour the popcorn onto a rimmed baking sheet, or your biggest, widest bowl. Immediately drizzle ¼ cup olive oil all over the popcorn. This needs to happen while it’s still hot, and then you have to toss thoroughly and with intention to coat the kernels with oil. When they’re glossed up, sprinkle nutritional yeast, chile flakes, and kosher salt overtop liberally, then toss vigorously to disperse it. If you're more of a melted butter person, or want to add grated cheese or lots of pepper or what have you, you should feel free to do you. The important thing to remember is that you need to add the fat—olive oil, coconut oil, butter—first, then add anything dry—spices, salt—and toss, toss, toss, otherwise the dry bits won't have anything to stick to.

SECOND WAY TO POP: RIGHT ON THE COBB!! 

WHAAAAAAT?!? I KNOW, MY MIND IS ALSO BLOWN.

  1. SHUCK CORN

  2. Place the cob in a brown paper lunch bag.

  3. Fold the bag up a couple times to keep the steam in

  4. Cook the cob in the microwave. Set it to a popcorn setting if you have that.

  5. DEVOUR

FALL CSA WEEK 3


P I C K L I S T  

CELERIAC - FENNEL - CHIVES - DILL - BEETS - DELICATA WINTER SQUASH - ONIONS - ARUGULA - CAULIFLOWER - PEPPERS (GREEN, ORANGE, HOT) - EGGPLANT - TOMATO

 CSA BREAD SHARE: CHEDDAR THYME FOUGASSE

The temps have shifted, the light levels are waning, and our bodies could all use a little rest BUT still no frost.  At this point we are all so ready for the immediate slow down that comes with a kill frost, but goodness gracious that early morning freeze refuses to settle on our fields. Our micro climate along the Connecticut River comes with a natural season extender- the early morning fog.  So when other places around the Upper Valley get a frost, we often experience a near miss due to heavy fog that rolls in off the river banks and blankets the fields, protecting the plants.  This typically helps us get through the month of September- but now we are approaching November and like the ever popular sitcom Friends, we could have used a kill frost a couple of weeks ago (and the Rachel/Ross drama probably should have wrapped up by season 6, yes? Does this metaphor even work here?).  So while our bellies are looking towards roasting root crops and diving into soup season, Mother Nature continues to have different plans, and insists we all eat eggplant, tomatoes, and peppers for yet again, another week.  

Also in weather news (because as farmers, outside conditions completely dictate our lives) though we remain frost free, we are still chilled to the bone by the end of the day.  No one likes working in 40 degrees and raining, but the garlic had to be planted and rebar in the raspberries had to be pulled.  As for me, I strategically moved from greenhouse to greenhouse picking CSA veg from undercover because when the temps duck below 50, I turn into a real fair weather farmer.  Right now, I am so grateful for those greenhouses that your fennel, chives, dill, and arugula were all harvested in, keeping me cozy in even the shittiest conditions.   

 PRO-TIPS:

 FIRST, MAKE THIS...

 BEET TZATZIKI

1 cup cooked beets, grated using a box grater (4-5 golf ball sized beets roasted or boiled)

1 teaspoon finely chopped garlic (about 1 clove)

2 teaspoons freshly squeezed lemon

1 teaspoon salt

1.5 cups whole milk plain yogurt

1 tablespoon olive oil

Black pepper to taste

1 tablespoons chopped fresh dill

  • Place the garlic into a medium mixing bowl with lemon juice and salt.  Let it stand for about 10 minutes.  This takes some of the heat out of the raw garlic.

  • Stir in yogurt, olive oil, and black pepper.

  • Fold in the shredded beets and dill, and re-season with salt and pepper to taste if necessary.  Serve the beets cold or at room temperature.

 NEXT, MAKE THIS to go with the above tzatziki:

(The most delicious Middle Eastern Sandbo)

1 cup hummus

4 whole pita

fresh ground pepper to taste

1/2 small onion, chopped (about 1/2 cup) (optional)

1/4 cup chopped flat-leaf parsley (or dill!)

3/4 lb tomatoes, seeded and chopped (about 1 1/4 cups)

3/4 lb cucumbers, peeled, seeded and chopped (about 1 1/2 cups)- (JENNYS NOTE:i know, i know, no cukes to be found from here until June, But chop the green peppers, and or fennel to bulk up this salad)

vegetable oil for frying

3/4 teaspoon kosher salt, plus more to taste for seasoning

1 1lb eggplant, sliced into 1/2-inch rounds

4 hard-boiled eggs, sliced

1/2 cup prepared tahini sauce

schug (hot sauce) to taste

amba (mango pickle) to taste

Sprinkle eggplant on both sides with salt, place on a cookie sheet or wire rack, and let rest 30 minutes. Press eggplant slices firmly between paper towels to remove excess salt and moisture. Heat 1 inch of oil in a large frying pan until very hot but not smoking, about 375F. Working in batches, fry eggplant until dark brown and tender, about 5-6 minutes on first side and 2-3 minutes on second side. Using a slotted spoon, remove eggplant and drain and cool on paper towels.

In a small bowl combine cucumbers, tomatoes, parsley, onions (if using), and salt and pepper to taste. Reserve.

To assemble sandwiches, warm pitas in a 300F oven for 5 minutes, or in the microwave on high for 30 seconds. Spread 1/4 cup hummus inside each pita, then fill with 1 sliced egg, 3 to 4 slices fried eggplant, and about 1/2 cup salad. Drizzle with 2 tablespoons tahini and hot sauce to taste.

1 celery root (celeriac), peeled, cut into 1/2-inch pieces (about 4 cups)

2 1/2 pounds russet potatoes, peeled, cut into 1-inch pieces (about 61/2 cups)

1/4 cup (1/2 stick) unsalted butter, cut into pieces

1/2 cup (or more) whole milk

1/4 cup chopped celery leaves

Step 1

Cook celery root in large pot of boiling salted water 5 minutes. Add potatoes to pot; cook until all vegetables are tender, about 20 minutes. Drain. Return vegetables to pot; stir over medium-high heat until dry, 1 to 2 minutes. Remove from heat; add butter. Using potato masher, mash vegetables until butter is incorporated. Add 1/2 cup milk; mash until almost smooth, adding more milk as needed. Stir in celery leaves. Season with salt and pepper.

There is no obvious point of entry when dealing with celery root. Prepping it isn’t complicated, though: Use a chef’s knife to cut off the top and bottom of the root, exposing the pale flesh of the interior. Prop the root on one of the newly flattened poles, and, using curved downward strokes, cut off the brown skin in long swaths. Once peeled, cut the root into chunks, cutting out any spongy bits that may develop at the center.

medium celery roots (celeriac), peeled, cut into 1½” pieces 

2 tablespoons walnut oil or olive oil

Kosher salt and freshly ground pepper

1tablespoon cider vinegar

2 tablespoons chopped toasted walnuts (for serving)

Fresh thyme leaves (for serving)

Preheat oven to 425°. Toss celery root with oil on a rimmed baking sheet and season with salt and pepper. Roast until golden and tender, 20–25 minutes. Toss warm celery root with vinegar. Serve topped with walnuts and thyme.


FALL CSA WEEK 2

- p i c k l i s t -

RAINBOW POTATOES - SHALLOTS - CARROTS - SPINACH - MINT - ARUGULA - LEMONGRASS - BROCCOLI - CARMEN PEPPERS (RED, ORANGE, YELLOW) - POBLANO PEPPERS - JALAPENO PEPPERS - GINGER

BREAD SHARE: Winter Squash Quick Bread

 In this week of picking and eating, we all get to delight in my (Jenny’s) favorite things. GINGER! LEMONGRASS! SHALLOTS! MINT! SPINACH! ARUGULA!  the pick-list of my dreams! To be surrounded in a greenhouse of ginger, or slicing through a field of lemongrass skyrockets your scent buds all the way up to the cosmos- i know all this language for harvesting crops is super flowery, but for this week in CSA eating, you too will be transported to a place of unicorns, rainbows, fairies and warm hugs- because that is the power of these crops in combination.  Also, I am grateful this harvest arrived when it did- as the temps have officially dropped and we could all use a little extra warmth from the ginger.  Really and truly, I’m pretty sure that at this point in the season, there is no place I’d rather be than in a greenhouse surrounded by ginger plants aka heaven.  

In other news, this week we finally head into the sweet potato field for harvest, daily orders for the coop continue to be picked, packed, and delivered and personally I played catch up on my own canning, freezing, and winter readying- the jars are canned and the freezer overfloweth.

 PRO-TIPS:

Ginger: For those of you that are not committed to using your ginger THIS WEEK, I beg you to store in a ziplock and freeze asap.  The type of ginger we grow is young and does not hold well like the kind you purchase at the grocery store.  But read on for my top 2 fave ginger recipes… 

Carrot-Ginger Dressing (SMITTENKITCHEN.COM)

(JENNYS NOTE:  after 13 years of CSA pick-lists and newsletters, I believe I’ve included this recipe maybe 7 times- maybe more?  Can’t help myself, its too good and what we should all be doing with our CSA this week)

 This recipe yields 1 to 1 1/4 cups dressing.

The major changes I made to the recipe were to increase the miso and sesame oil because I like it when their flavors are noticeable. This recipe has a real bite to it from the fresh ginger and the shallot. The original recipe suggested a large one, I suggest a more thimble-like small one. If you don’t want as loud of a ginger bite, use one tablespoon instead of two. This will make a lot but I like salads best with a heavy helping of this. You’ll go through it faster than you’d expect.

DRESSING

  • 1 large carrot, peeled and roughly chopped

  • 1 small shallot, peeled and roughly chopped

  • 2 tablespoons roughly chopped fresh ginger

  • 2 tablespoons white miso

  • 2 tablespoons rice vinegar

  • 2 tablespoons toasted sesame seed oil

  • 1/4 cup grape seed or another neutral oil

  • 2 tablespoons water

Make the dressing: Whiz the carrots, shallot and ginger in a blender or food processor until finely chopped. Scrape down the sides, then add the miso, vinegar and sesame oil. While the machine running, slowly drizzle in the grape seed oil and the water.  Next, Drench all your greens in this salad dressing, maybe even eat it by the spoonful, its soooo good.

Creamed Coconut Spinach (MARTHASTEWART.COM)

(JENNY’S NOTE: the sad truth here is that you do not have enough spinach here to make this recipe, BUT if you have any swiss chard from last week still taking up fridge space, I highly recommend bulking up the recipe with those leftover greens- this recipe is made as much as possible in our house when the spinach and ginger harvest collide)

Servings: 4

3 tablespoons ghee

20 ounces flat-leaf spinach, washed and drained

2 shallots, halved and sliced

1 tablespoon minced fresh ginger

2 teaspoons minced jalapeno chile

2 tablespoons unbleached all-purpose flour

1/2 teaspoon ground cumin

Pinch of sugar

1 cup coconut milk

Kosher salt and freshly ground pepper


Step 1
Heat scant 1 tablespoon ghee in a large Dutch oven over medium. Add spinach and cook, stirring, until just wilted, 3 to 5 minutes. Drain spinach in a sieve, pressing to remove excess liquid. Let cool slightly, then roughly chop.

Step 2
Return pan to medium heat and melt remaining 2 tablespoons ghee. Add shallots, ginger, and jalapeno and cook until softened, 3 to 5 minutes. Stir in flour, cumin, and sugar and cook for 1 minute, then slowly whisk in coconut milk. Bring to a boil, reduce to a simmer, and cook until thickened, 1 to 2 minutes.

Step 3
Stir chopped spinach into coconut mixture and season with salt and pepper.

Lemongrass BY SHOSHI PARKS (bonapp) 

(JENNY’S NOTE: yes this is a repeat lemongrass write up from the summer CSA but its pretty useful to read up on if you are a newbie CSAer and this is your first experience with lemongrass.  If anyone is curious what I will be doing with my lemongrass this week, I intend to add it to a massive batch of bone broth and chop the rest into 2 inch pieces to freeze for later broth/tea/curry/etc…)

As its name suggests, lemongrass is a grass with botanical origins that stretch across South and Southeast Asia, from India and Sri Lanka to Indonesia and the Philippines… Used whole, chopped, or pummeled into a paste, lemongrass adds a light but complex flavor and aroma—simultaneously lemony (hence the name), gingery, and floral—to sauces, soups, and meats.

In some parts of the world, lemongrass is also treasured for its health benefits. When brewed into a tea, the plant is considered an immunity-boosting treatment for a wide variety of ailments including gastrointestinal distress, fever, and asthma.

How can you use it? In South and Southeast Asian cooking, lemongrass commonly conspires with ingredients like garlic, galangal (and/or ginger), cilantro, Thai basil, shallots, lime leaves, and coconut milk to create bold, complex flavors.

To prepare lemongrass, start by peeling the stiff outer leaves away from the stalk to reveal the slightly softer underlayers. Slice the grass in two spots, about half an inch from the root and approximately three inches up, where the whitish color begins to turn green.

The pale lower section of the lemongrass is the meatiest bit. Even so, it must be sli ced thin and then finely chopped, pounded into a paste with a mortar and pestle, grated with a box grater, or tossed in a food processor so that it isn’t too tough to chew. This is frequently how lemongrass is used in Cambodian cooking, Yun says, especially in the preparation of the spice paste kroeung.

Lemongrass is often finely chopped or pounded in order to break down the tough stalks.

But while only the lower bulb of the lemongrass stem is edible, every portion of the stalk has a role to play in the kitchen. The fibrous upper section of the stalk is full of tons of lemony, gingery goodness. To release the flavorful oils, both Yun and Payumo like to bash or flatten the lemongrass stalk with a cleaver or the side of a large knife. Payumo will also sometimes bend the stalk back and forth a few times instead of smashing it to release the oils.

Fresh lemongrass stalks work best in dishes like soups and slow-roasted meats that simmer for long periods of time. In Filipino cuisine it’s commonly stuffed inside whole pigs or chickens and then roasted, Payumo says. Extensive simmering or roasting is also the best use for dry lemongrass, which rehydrates as it cooks. Like with bay leaves, remove the lemongrass stalks from the dish before serving. 

How should you store it? If you store it right, lemongrass will pretty much last forever. Wrapped loosely in a towel, the stalks will stay fresh and flavorful for a few weeks in the fridge. Otherwise, they’ll do just fine in the freezer, either uncut or pre-prepped. Try portioning minced, pounded, or grated grass into an empty ice tray for no-fuss future use. Dried and powdered lemongrass should be kept in sealed containers and out of the light.

Now go smash, slice, and pound away. You may not be getting to South or Southeast Asia this year, but with your new lemongrass skills, at least your culinary skills will permit you to imagine.

FALL CSA WEEK 1

- p i c k l i s t - 

LETTUCE - SWISS CHARD - MIXED POTATOES - HABANADA PEPPERS - HOTTIE PEPPERS - CARMEN PEPPERS - LEEKS - GARLIC  - OREGANO - THYME - PLUM TOMATOES - GREEN BEANS - EGGPLANT - ROMANESCO - CORN

7A855AE5-E211-4DBA-A009-573447123CD6.jpg

BREAD SHARE: FOCACCIA

IMG_1942.jpg

 Fall CSA feeling alot like Summer right about now.  The weather remains with no frost forecast in sight, so we will continue picking all the summer faves until the inevitable cold snap knocks it all down.  The most unlikely crop yall got this week was 3lbs of tomatoes- making me really question what month we are in.  All that said, I am so sorry if you signed up for FALL CSA expecting only Fall crops- This season, Mother Nature has a different plan for us all.

As far as farm updates go, this week we continue to harvest cherry tomatoes, green beans and raspberries.  We are binning and sorting potatoes and onions for winter storage.  We are moving an abundance of produce through the coop food stores, Brownsville Butcher and Pantry, Crossroad farm in Norwich, Jakes Quechee Market, Woodstock Farmers Market, Rumbrook Market, etc… I say all this in case you need to scratch that Edgewater itch in between Fall CSA pick ups (wink winK).  We are also contemplating Fall projects- but mostly contemplating because who wants to cut back perennial crops and take down tomato stakes when the plants are still partying so hard and producing good food?!?

 Bottomline here, its still Summer.  I’m wearing a tank top.  Party on (Wayne).    

 PRO-TIPS:

 ROMANESCO:   Hello fractals! Voted the wildest looking brassica by yours truly, this cousin of a cauliflower is a real stunner.  Cook as you would cauliflower or broccoli.  Tastes phenomenal roasted or steamed, as any good brassica would.  

 HABANADA PEPPERS: These orange creamsicle colored pinted up cuties are in fact sweet and totally addictive.  

 MOM’S TOMATO SAUCE (FROM MY FAVE CANNING COOK BOOK TART AND SWEET

1 Tablespoon olive oil

about 3 pounds of tomatoes chopped 

1 medium onion (or leek), chopped

3 tablespoons tomato paste

½ green bell pepper, chopped

2 tablespoons white wine

½  red bell pepper or 1 full carmen pepper, chopped

1 teaspoon brown sugar

3 cloves of garlic, sliced or minced

kosher salt and pepper to taste

½ pound ground pork sausage (totally optional)

3 tablspn chopped herbs (oregano! Thyme! etc!)

10 fennel seeds

 Heat the oil in a large saucepan over medium heat.  Add the onion (or leeks), peppers, and garlic.  Cook until the vegetables are soft, about 6 minutes.  Add the pork and cook, breaking up the meat until it no longer shows pink, about 4 minutes.  Strain the grease if necessary.  Add the fennel, tomatoes, and juice, tomato paste, wine, brown sugar, salt, and pepper.  Simmer for 15 minutes.  Add the herbs and simmer for another 15 minutes, adjusting heat as needed


A chard gratin:

From Nigel Slater’s Cookbook TENDER   Enough for 4

1 bunch of Chard stems and leaves

1 tablespoon of whole grain mustard

1 ¾ cup heavy cream 

Grated parmesan

 Preheat the oven to 350 degrees.  Cut the chard leaves from the stems.  Chop the stems into short lengths, then cook briefly in boiling, lightly salted water until crisp and tender.  Dip the leaves in the water briefly, until they relax.  Drain tand put them in a buttered shallow ovenproof dish.  Put the mustard in a bowl and stir in the cream and a grinding of salt and pepper.  Pour the seasoned cream over the stem and leaves, cover with grated parmesan, and bake until the top has a light crust the color of honey.  

Adapted from Gourmet, August 2009 POSTED ON SMITTENKITCHEN.COM

The following is a true pain in the ass recipe, but if you can commit to the process of making this pie- you will be so pleased with yourself.   I made this pie once, swore i would never make it again- and have made it again, and again- a real hoorah to harvest season in a buttery crust.

Adapted, barely, from Gourmet’s adaptation of Laurie Colwin’s and Jame’s Beard’s versions

2 cups all-purpose flour

1 tablespoon baking powder

1 3/4 teaspoons salt, divided

3/4 stick (6 tablespoons or 3 ounces) cold unsalted butter, cut into 1/2-inch cubes, plus 2 teaspoons melted

3/4 cup whole milk

1/3 cup mayonnaise

2 tablespoons fresh lemon juice

1 3/4 pounds beefsteak tomatoes

1 1/2 cups corn (from about 3 ears), coarsely chopped by hand (my preference) or lightly puréed in a food processor, divided

2 tablespoons finely chopped basil, divided (skipped this, no harm was done)

1 tablespoon finely chopped chives, divided

1/4 teaspoon black pepper, divided

7ounces coarsely grated sharp Cheddar (1 3/4 cups), divided

Whisk together flour, baking powder, and 3/4 tsp salt in a bowl, then blend in cold butter (3/4 stick) with your fingertips or a pastry blender until it resembles coarse meal. Add milk, stirring until mixture just forms a dough, then gather into a ball.

Divide dough in half and roll out one piece on a well-floured counter (my choice) or between two sheets of plastic wrap (the recipe’s suggestion, but I imagined it would annoyingly stick to the plastic) into a 12-inch round (1/8 inch thick). Either fold the round gently in quarters, lift it into a 9-inch pie plate and gently unfold and center it or, if you’re using the plastic warp method, remove top sheet of plastic wrap, then lift dough using bottom sheet of plastic wrap and invert into pie plate. Pat the dough in with your fingers trim any overhang.

Preheat oven to 400°F with rack in middle. If your kitchen is excessively warm, as ours is, go ahead and put the second half of the dough in the fridge until you’re ready to use it. Whisk together mayonnaise and lemon juice.

Cut an X in bottom of each tomato and blanch in a large pot of boiling water 10 seconds. Immediately transfer with a slotted spoon to an ice bath to cool. Peel tomatoes, then slice crosswise 1/4 inch thick and, if desired (see Notes above recipe), gently remove seeds and extra juices. Arrange half of tomatoes in crust, overlapping, and sprinkle with half of corn, one tablespoon basil, 1/2 tablespoon chives, 1/2 teaspoon salt, 1/8 teaspoon pepper and one cup of grated cheese. Repeat layering with remaining tomatoes, corn, basil, chives, salt, and pepper. Pour lemon mayonnaise over filling and sprinkle with remaining cheese.

Roll out remaining piece of dough into a 12-inch round in same manner, then fit over filling, folding overhang under edge of bottom crust and pinching edge to seal. Cut 4 steam vents in top crust and brush crust with melted butter (2 teaspoons). Bake pie until crust is golden and filling is bubbling, 30 to 35 minutes, then cool on a rack. Serve warm or at room temperature.

Do ahead: Pie can be baked 1 day ahead and chilled. Reheat in a 350°F oven until warm, about 30 minutes.

An idea: Want to slab pie this and serve it to a crowd? I agree, it would be brilliant. This is how I’d approach it: Make 1 1/2 batches of the crust (slab pies require more crust for the same amount of filling) and arrange the filling in one layer instead of two in a parchment-lined 15x10x1-inch pan. Increase the amount of butter you brush the top with to a tablespoon or two and the baking time to about 45 minutes (this is an estimate, you should take it out when it is golden and the filling is bubbling). Be sure to remove the tomato seeds; that extra wetness could make for a slab pie mess.


CSA WEEK 17 (October 6th, very belated posting)

-p i c k l i s t - 

LETTUCE - ARUGULA - DAZZLING BLUE KALE - MIXED POTATOES - SHISHITO PEPPERS - HABANADA PEPPERS - DANGJO CHEONG YANG HOTTIE PEP - CARMEN PEPPERS - CARROTS - RED ONIONS - YELLOW ONION - GARLIC  - SAGE - TULSI - WATERMELON - PLUM TOMATOES

93EC66C8-013B-43E6-84D5-1513FD2BE1B8.jpg

Whoa CSAers, we did it.  Another summer of eating Edgewater crops!  With last season's deep pandemic times, it really hit home just how much this community of eaters bonds us all.  From Grantham NH to Brownsville, VT and many spots in between, we’re all sharing meals.  We’re all staring at that same DANGJO CHEONG YANG pepper, wondering about its heat index.  We are all eating the same potatoes thankfully dug by 0 hands, but rather our monster machine potato harvester.  We are also all biting into the habanada pepper praying it's not actually a habanero.  We’re all turning on our ovens to roast whatever is left over from this week’s bounty in an effort to not only cook until soft and sweet,  but also to warm our house and forgo turning on the heat/lighting the woodstove for one more day…  

As for me, I am also doing all of this right along with you.  But first today at 8pm (post deliveries, post kiddo bedtimes) I am taking a massive exhale…  This season of growing was not easy.  From drought back in June, to disease and rot in July, and playing catch up with all the rest in August, there have been many moments this Summer of shrugging shoulders, and swearing it’ll be better next year.  But here we are 17 weeks later.  As a CSAer, you never got the classic Edgewater bounty.  You were without heaps of plum tomatoes for sauce, or cilantro for your salsa (I am still kicking myself for not being more on top of that mid summer herb planting).  You went week after week without cabbage for slaw or kraut, and there was barely an heirloom tomato in sight… you never complained about end of season soft blueberries, and did we even grow cucumbers or dill?  Somehow, without these summer staples, we all continued to eat like kings and queens and try new things (lemon balm! Anise hyssop! Perilla! Lemon cucumbers! Daikon radishes! Lemon grass! tulsi!).  THIS is the beauty of growing food on an extremely diversified crop farm, as well as picking for an extremely open minded community.  Big cheers to that and to you!

 Starting tomorrow we get going on FALL CSA prep:  We’ve bought winter squash from Mclennan Farm in Windsor (because what’s a Fall CSA without butternuts and delicata?), the sweet potato crop is about to get dug and cured and we are planting up so many greenhouses with all my favorite cold hardy greens (and cilantro!!). The rush of Summer has certainly peaked but we have miles to go before hibernation. 

 Lastly, looking ahead at the 10 day forecast with no frost insight truly warms my heart.  Mother Nature is literally telling us “chin up kid, we’re not done yet.”  So with that, let’s all crack open our October watermelons and pretend it's Summer a little longer.  

 Hope to pick for you all next year or maybe even next week when we begin the Fall CSA. 

Peace, Love, and Winter Greens, Jenny

 PRO-TIPS:

 TULSI:  And if you are like me and a little overwhelmed by this call of Mother Nature to keep partying so hard, steep this herb in hot water, and drink for a real destressing nightcap.

 DRYING SAGE:

IF YOU DO NOT WANT TO USE SAGE (or tulsi) IMMEDIATELY, HANG AND DRY AND STORE!

How to Dry Sage Leaves:  Attach a string to the bottom of the bundle and hang upside down in a warm dark spot with plenty of ventilation. 

1 tablespoon unsalted butter

2 red onions, chopped

5 garlic cloves, minced

3 tablespoons chopped fresh sage

2 pounds Yukon Gold potatoes, thinly sliced (about 7 cups)

1 1/2 cups water

1 1/2 cups whipping cream

1 teaspoon salt

1 /2 teaspoon ground black pepper

Preparation

Step 1

Preheat oven to 400°F. Melt butter in heavy large ovenproof skillet over medium-high heat. Add onions, garlic, and 2 tablespoons sage; sauté 5 minutes. Add potatoes and 1 1/2 cups water. Bring to boil. Boil until water is completely absorbed, about 8 minutes. Add cream, salt, and pepper; bring to boil. Transfer skillet to oven and bake until potatoes are tender and top is golden, about 40 minutes. Sprinkle with remaining 1 tablespoon sage. Serve immediately.

(JENNYS NOTE: I can't remember if we’ve done this recipe this season.  If we have, I am so sorry for the repeat, but this dazzling blue variety is ideal for making these chips, my 5 year old highly recommends…)

 Walk away from the vending machine—and let these crunchy kale chips satisfy any strong snack cravings you have on slow weekday afternoons.

Ingredients

12 large Tuscan kale leaves, rinsed, dried, cut lengthwise in half, center ribs and stems removed

1 tablespoon olive oil

Preparation

Step 1

Preheat oven to 250°F. Toss kale with oil in large bowl. Sprinkle with salt and pepper. Arrange leaves in single layer on 2 large baking sheets. Bake until crisp, about 30 minutes for flat leaves and up to 33 minutes for wrinkled leaves. Transfer leaves to rack to cool.


CSA WEEK 16

P I C K L I S T

CHERRY TOMATOES - GOLD POTATOES - LEEKS - CORN - KALE - PARSLEY - RASPBERRIES - LUNCHBOX PEPPERS - ROMAINE LETTUCE - CARMEN PEPPER - HOTTIE PEPPER - CARROTS - GREEN BEANS

C4005D8B-A57F-4F4D-AA29-0F5751899813.jpg

 Somehow, we are entering October.  Somehow it is week 16 of Summer CSA. The tomato ripening has really slowed down, the potato harvest is well underway, and yesterday was my first day working in carharts since early May.  Full disclosure, I’m not into this transition.  It is officially Fall here and I am waaaay too emotional to even approach the inevitable truth that Summer is over (I just want it to last forever), so let’s just move right into pro-tips and save the tears for next week (the very last week of SUMMER CSA!).  

 That said, I am very pumped about keeping the party going through our Fall CSA starting October 13th!  

Who’s coming with me? (and Allie!!)

 PRO-TIPS:

 corn ear worm, A WARNING:

There is no way your corn is earworm free… For that I am sorry.  Corn earworms appear to have taken residency in damn near every ear of corn.  However I need to tell you how harmless these little devils are and how they are no different from the rest of us.  Like you and I, the corn ear worm is looking for a cozy place to call home and a delicious meal (grown by your favorite farmers) to satiate their hunger.  With an ear of corn, they can fulfill both those basic needs.  OOOOF BUT NO ONE WANTS TO SEE A WORM IN THEIR FOOD!! 

 So here is the solution: Cut off the top portion of the corn- discard the ear worm habitat (they usually hang out right on top) and use the lower ¾ of the ear.  

To make this vegetarian, omit the bacon and replace with more shiitake mushrooms; sauté them until they’re golden brown. This is part of BA's Best, a collection of our essential recipes.

Ingredients

8 SERVINGS

8 ears of corn

2 Parmesan rinds (about 4 ounces; optional)

4 ounces shiitake mushrooms, stems removed and reserved, caps cut into ¼-inch pieces

2 sprigs thyme

1 bay leaf 

Kosher salt

5 tablespoons unsalted butter, room temperature, divided

Freshly ground black pepper

¼ cup dry white wine

4 ounces thick-cut bacon, cut into ¼-inch pieces

1 pound potatoes, cut into ½-inch pieces

3 shallots, thinly sliced

1 medium leek, white and pale-green parts only, quartered lengthwise, thinly sliced

2 garlic cloves, finely grated

2 Fresno chiles, seeded, finely chopped

2 tablespoons all-purpose flour

2 cups heavy cream

1 tablespoon chopped marjoram 

Chopped parsley and crushed oyster crackers (for serving)

Preparation

Cut kernels from cobs and place in a large bowl. Place cobs in a medium pot and add Parmesan rinds, if using, mushroom stems, thyme, bay leaf, 2 tsp. salt, and 8 cups water. Bring to a boil, then reduce heat to medium-low and simmer, stirring occasionally, until broth is fragrant and reduced by half, 40–50 minutes. Strain through a fine-mesh sieve into a medium bowl; discard solids and set broth aside.

Meanwhile, heat 4 Tbsp. butter in a large heavy pot over medium-high. Add corn kernels, season generously with salt and pepper, and cook, stirring occasionally, until corn is tender and juices have evaporated and browned on the bottom of the pot, 12–15 minutes. Reserve ½ cup corn for serving; transfer remaining corn to a medium bowl.

Add wine to pot and cook, scraping up browned bits, until liquid is syrupy, about 2 minutes. Scrape into bowl with remaining corn.

Heat remaining 1 Tbsp. butter in same pot over medium and cook bacon until golden brown and fat has rendered, about 6 minutes. Add potatoes, shallots, leek, garlic, and chopped mushrooms and cook, stirring occasionally, until vegetables have softened but haven’t taken on any color, 12–15 minutes. Add chiles and cook until fragrant and softened, about 3 minutes. Stir in flour and cook until nutty and fragrant, about 1 minute. Add reserved broth, bring to a boil, and cook, stirring occasionally, until potatoes are fork-tender, 10–15 minutes. Add cream and corn mixture and cook, stirring, until chowder has thickened, 5–10 minutes. Remove from heat and stir in marjoram. Let sit 15 minutes before serving.

Divide chowder among bowls. Top with parsley, oyster crackers, and reserved ½ cup corn; season with pepper.

 AND IF YOU ARE NOT IN THE MOOD FOR CORN CHOWDER (IS THIS EVEN POSSIBLE?) 

… FREEZE FOR LATER!

Freezing is a quick and convenient way to preserve vegetables at home. Sweet corn is a popular, easy and excellent vegetable to freeze. You can enjoy the great taste of summertime sweet corn all year long by following simple, basic procedures for freezing vegetables.

Blanching is a must

Blanching, followed by chilling in ice water, are critical processes for producing quality frozen corn. The natural enzymes in corn need to be inactivated before freezing to prevent both loss of color and nutrients, and flavor and texture changes. These enzymes are inactivated by a hot blanch treatment. The chilling process prevents the corn from becoming mushy due to overcooking the starch.

Husk, blanch, cool, cut, package, freeze, eat

An electric knife is a handy tool for cutting off the kernels.

  1. Husk ears and remove silk.

  2. Bring 6 to 8 quarts of water to a boil.

  3. Submerge several ears at a time.

  4. Blanch the ears for 4 minutes.

  5. Cool promptly in ice water for 4 minutes.

  6. Drain.

  7. Cut the kernels from the cob. An electric knife is a handy tool for cutting off the kernels.

  8. Package the corn in freezer containers, leave one-half inch headspace.

  9. Seal and freeze at zero degrees F or below.

  10. For best quality, eat within 8-12 months of freezing.

CSA WEEK 15 (incredibly belated posted, a week late yikes)

P I C K L I S T

WATERMELON - ARUGULA - LEMON BALM - POBLANO PEPPERS - SWEET CARMEN PEPPERS - 

HABANADA PEPPERS - BEETS - RED ONION - RED FINGERLING POTATOES - 

EDAMAME 0R GREEN BEANS - CHERRY TOMATOES - SERRANO PEPPER (HOTTIE)

0138A2CB-4DC0-4D18-A276-558E335D1456.jpg

 A list of all the celebrations converging at once: Fall Equinox, Sukkot, and CSA DAY.

While I am totally exhausted at the thought of taking the time to honor any of these holidays, I am completely enamored with every single one of them.  

First, enter the Fall Equinox:  which for me translates beyond pumpkin spice everything (especially since we lost our winter squash crop to drought back in June).  As a farmer, the equinox forces you to stop at a certain time of day.  By 7pm the world is dark, and unless we bring headlamps to the field there is no point in further picking raspberries/cherry tomatoes/etc…  The day is now equal parts light and dark and I feel it in my tired zombie farming bones that it is imperative to pay respects to the equinox and begin to go inward… in other words- it's time to slow the f down and take a little rest.

 SUKKOT:  Enter the Jewish harvest holiday.  A time to celebrate the land, the crops, etc…  This kind of negates what was previously mentioned about taking a little rest… But it does encourage the farmer to not only pick the crops, but also EAT THE CROPS (which is actually a pretty novel idea, as before kiddos Ray and I relied on too many hot dogs and potato chips for Summer season caloric intake).  

Lastly, we have your favorite weekly holiday and mine: CSA DAY!!  Yall are pretty familiar with this one by now, so i’ll leave it up to you to party the way you like with all that veg.  

 AND NOW A TOTAL NON SEQUITUR THAT I CAN'T SEEM TO SHAKE:  Last year at this time we had experienced our first frost and it was devastating.  Also, let it be known that the 10 day forecast is currently frost free. 

 OH and a quick note from the field:  If you need to find any folks from the crew- search no further than the raspberry crop by the farmstand or the trellised cherry tomatoes on River Road.   I’m pretty certain we are on week three of non-stop picking… Tim remarked on the abundance, “by the time you finish picking a row, the end where you started is ripe again.  Cherry tomatoes or raspberries probably inspired the original snake eating its own tail universe analogy.”  Good one Tim, Good one.

 PRO-TIPS:

 Lemonbalm: I LOVE THIS HERB.  I brew these leaves nearly nightly with hot water for the perfect bedtime tea. Do it and you will surely fall in love with this evening ritual.  

 Rajas con Crema is an easy Mexican dish that combines roasted poblano peppers with onions, Mexican cream, and melted cheese.

5 poblano peppers

1 tablespoon butter

1 medium onion, sliced

2 cloves garlic, minced

1/2 teaspoon coarse kosher salt, plus more to taste

3/4 cup Mexican crema* (store bought or homemade, I USE CREME FRAICHE!)

1 cup shredded Oaxaca cheese*

  1. Line a baking sheet with aluminum foil and place poblano peppers on top. Set your oven rack directly underneath the broiler and turn the broiler on high.

  2. Broil poblanos in the oven for 5 minutes, or until the skin is blackened and blistered. Carefully flip them over and broil for another 5 minutes, or until the skin is blackened and blistered on all sides.

  3. Remove them from the oven, loosely cover the baking sheet with aluminum foil or plastic wrap to keep in some of the heat to help them steam, and let them sit for 5 minutes.

  4. Pull and rub off as much of the loose skin on the peppers as possible. It doesn't have to be perfect. (View some step-by-step photos on how to roast poblano peppers.)

  5. Transfer poblanos to a cutting board, discard the stems and seeds. Cut poblanos into strips and set aside.

  6. Heat butter in a large skillet over medium-high heat. Add onions and cook for 5 minutes, until softened and translucent.

  7. Add garlic and cook for 30 seconds, stirring frequently.

  8. Add roasted poblano pepper strips, Mexican crema, and salt. Stir together to combine and cook for 2 more minutes.

  9. Add shredded cheese and stir together until the cheese completely melts. Remove from heat and serve immediately in warm tortillas or with tortilla chips.

ISABEL’S TIPS: I highly recommend using Mexican crema if you can find it. More and more large grocery stores are starting to carry it. It’s typically found in the dairy aisle near the cheeses and milks. If you can’t find it, a good substitute is crème fraîche. Or better yet, you can make your own Mexican crema at home.

Oaxaca cheese is recommended because it melts smoothly and gives the dish a luxurious stretch. You can typically find Oaxaca cheese in the specialty cheese section or the dairy section in your grocery store. Specialty Hispanic grocers also commonly carry it. If you can’t find it near you, you can use monterey jack cheese or mozzarella.

 AND FOR THE LACTOSE ADVERSE: 

By Diana Kennedy  Yield: 6 APPETIZER OR 4 FIRST-COURSE

  • 3 tablespoons vegetable oil

  • 1 cup thinly sliced white onion 

  • Salt

  • 1 pound poblano or Anaheim chiles (about 6 medium chiles)—charred, peeled, with stems, seeds and veins removed and flesh cut into narrow strips

  • 1 cup strong beer

  • 6 ounces medium-sharp Cheddar or domestic Muenster cheese, cut into thin slices
    Heat the oil in a deep, nonreactive, medium skillet or shallow flameproof casserole. Add the onion, season with salt and cook over moderate heat until translucent.
    Add the chile strips, cover the pan and cook until just tender but not soft, about 4 minutes. Add the beer, increase the heat to high and boil, uncovered, until it is absorbed by the chiles, about 7 minutes. Spread the slices of cheese over the chiles and heat until melted. Serve immediately.

AND IF YOU NEED FURTHER POBLANO INSPO, GOOGLE CHILE RELLENOS!!

Habanadas!!:  YALL!  These little habanero peppers are heatless!  They have that same smoky fruity flavor of a habanero but with 0 heat.  You can impress all your friends with the obvious party trick of eating a whole “hot” pepper with out breaking sweat- or just enjoy them on their own.  I love them.

 Roast your peppers!! YES, you are right- you do have an insane amount of peppers this week.  I totally encourage you to roast and keep in olive oil in your fridge OR roast and freeze.  We roast a ton of peppers each fall to consume all winter.  They are awesome in soups, pizza, sauces, etc.


CSA WEEK 14

P I C K L I S T

RASPBERRIES!!! - WATERMELON - GREEN KALE - LEMONGRASS - ASIAN EGGPLANT - THAI BASIL - SWEET CARMEN PEPPERS - SHISHITO PEPPERS - DANGJO CHEONG YANG HOT PEP - CARROTS - ONION - GARLIC

 Pooh Sprague (original farmer at Edgewater with wife and fastest bean picker Anne) infrequently updates a blog on our website -Pooh’s Corner- that offers his seasonal farming perspective etc… he posted this on Tuesday (September 14th), just in time for the CSA newsletter, thought yall might like checking in on Pooh’s thoughts…

 PRO-TIPS:

Shishitooooosssss!!  You know what to do, but if you have forgotten: bring these peps right to your pan or grill, shmear in olive oil and fry or grill until popped and blistered.  Salt and Devour immediately

FOR NOTES ON LEMONGRASS AND HOW TO USE: 

Scroll back to week 10 and read up on all things lemongrass. 

 BUT FOR MY FAVORITE THING TO DO WITH LEMONGRASS, SEE:


TOM KHA SOUP (Thai coconut chicken soup with chicken, mushroom and coconut milk)

  • 8 oz. (226 g) boneless and skinless chicken, breast or thighs, cut into strips or thin pieces

  • 20 canned straw mushrooms

  • 1 1/2 cups coconut milk

  • 1 cup water

  • 1 stalk lemongrass, cut into 3-inch lengths and pounded

  • 6 kaffir lime leaves , lightly bruised to release the flavor

  • 6 slices galangal

  • 8 bird's eye chilies, lightly pounded

  • 3 tablespoons fish sauce

  • 2 1/2 tablespoons lime juice or to taste

  • 1 tablespoon chopped cilantro

Add water, lemongrass, galangal, chilies, kaffir lime leaves into a pot and bring it to boil. Add straw mushrooms and chicken and boil it on medium heat for a few minutes or until the chicken is cooked through. Add coconut milk and boil for a couple more minutes. Turn off the heat and add lime juice and fish sauce to taste. Add chopped cilantro before serving.

If you can't find galangal, do not use ginger. Ginger is not the substitute for galangal. "Tom Kha" means galangal in Thai. However, if you absolutely can't find galangal and still wish to make this because you love this soup so much, just make it without galangal.


https://rasamalaysia.com/tom-kha-gai-recipe-thai-coconut-chicken-soup/


Spicy eggplant from the burma superstar cook book

Curry style eggplant awesome over rice.


3 Japanese Eggplants, cut into 1-inch cubes (about 6 cups)

1 teaspoon salt

2 ½ tablespoons canola oil

2 cups finely diced yellow onion

3 tablespoons minced garlic

1 tablespoon minced ginger

1-2 Thai chiles, thinly sliced or 2 tablespoons minced jalapeno

1 small dried chile, broken in half, seeds retained

2 teaspoons shrimp paste

½ teaspoon turmeric

½ teaspoon paprika

1 teaspoon fish sauce

Handful of fried garlic chips (for how to on garlic chips: again head to our CSA BLOG and scroll back to CSA week 6)

Cilantro or thai basil sprigs for garnish

1 lime or lemon cut into wedges for garnish


Season the eggplant with salt and scatter onto a clean dish towel.  Let it sit while you prepare the remaining ingredients, at least 10 minutes.  Once the eggplant begins to bead with water, wrap the towel lightly and squeeze to remove excess liquid from the eggplant.  


In a wok or pot, heat 1 tablespoon of the oil over medium-high heat.  Add the eggplant, lower the heat to medium, and cook, stirring often, until the eggplant begins to soften, about 4 minutes.  Using a slotted spoon, scoop out the eggplant and transfer to a plate.  


Heat the remaining 1 ½ tablespoons of oil in the wok.  Add the onions and cook over medium-low heat, stirring often to prevent scorching, until softened, about 4 minutes.  Stir in the garlic, ginger, fresh and fried chiles, and shrimp paste and cook until the onions are completely soft and starting to turn golden, 3 more minutes.  


Add the turmeric and paprika and then stir in the eggplant and about ½ cup of water.  Lower to a gentle simmer and cook, stirring occasionally, until the eggplant is very soft and most of the water has evaporated, about 5 minutes.  Season with fish sauce, adding more for a saltier flavor, and squeeze a wedge or two of lime over the top.  Serve in a bowl and top with cilantro (and or thai basil!).  Offer extra lime wedges along side.   


The 7th Inning Stretch September 14, 2021:   We are approaching mid September here. School is back in session and as if that weren’t a wake-up call, we are staring down the ultimate harbinger of fall with the arrival of the World’s Fair in Tunbridge, VT. Surely the days will start getting much shorter now, and we often remark about it. We will see the breaking out of sweatshirts, neoprene picking gloves, rain gear and wool toques. In their orange rain pants the crew looks like they just came off the boat from the TV series “Deadliest Catch.” As the season winds down, many farmers are licking their seasonal wounds. We are -in farmer terms- “just past the 7th inning stretch” in our seasons, and there is still much to accomplish. This includes a lot of planting and seeding within the greenhouses to serve the late fall CSA. Our onions are gathered up, the first of three plantings of carrots up and in the cooler, and if Mike can find enough parts between our two old potato harvesters to make one functional harvester, we will soon be digging our 6 acres of potatoes. Once that crop is all graded, sized and stored in our barn, we can start washing and shipping them. We can then turn our attention to: cleaning up the place; planting next year’s garlic; readying the strawberries with sprays and mulching for next spring; fixing broken doors and sills in our funky collection of old greenhouses. Then the contracts will expire on the Jamaican crew, and they will head home to tend their own farms by early November. Plenty to do, and seemingly insufficient time and bodies to make it through the list. I have heard the muttering of “I wouldn’t mind a good frost now….” and this time it didn’t come from my lips first. On many farms, the wet July here in the Twin States brought forth an epic surge of weed germination and growth…and Edgewater was no exception. We daily watched the galinsoga engulf the strawberries, with no spare hours available to get in there and clean it out. We are looking for a good frost to freeze it down, leaving the strawberries to bask in the filtering fall sunlight without competition. Fortunately, the strawberry plants are in very good shape, and we are (perhaps foolishly) getting optimistic about our spring prospects. But everyone is busy harvesting and packing out 10 hours a day, and soon the light levels will dictate just how long we will be able to work in the fields. Despite a crop failure with pumpkins and winter squash, we have an almost epic fall raspberries crop. Trying to harvest and move that crop is mopping up a lot of extra hours. In the farmstand we have had to close down on Mondays for the rest of the season, because of a labor shortage, and we have had to reschedule the help we have. Labor shortage or not, our melons,tomatoes, pepper, cut flowers, leeks will be out there for another 4 weeks unless a frost stops them in their steps. Weather continues to be the biggest challenge and unknown for farmers, along with a dearth of local labor. Our season started hot and droughty from the end of March until the end of June. It was abnormally hot for so early in the growing season, and that created some minor problems in the greenhouses, but there was a non-stop 10-15 mph breeze or wind that just never abated. I felt like we were trying to farm in Pueblo, Colorado. The lack of rain was tough enough, but the constant wind withered and devastated transplanted crops. Then, the weather changed, and in 20 minutes we got an inch of rain, and it then continued to rain off and on for a month. A lot of disease showed up, so we were confronted with trading one extreme problem for another. However, August turned up benignly normal, and with adequate moisture the potatoes sized up and the field tomatoes and melons kicked into gear. We have been challenged, but thus far undamaged, by hurricanes. Many of my seacoast friends prepared for the worst wind event they hoped never to see. Weather models were in constant flux for us here in the Upper Valley. On the Saturday that Hurricane Ida was making landfall on Long Island, the forecast for us from the National Oceanic and Atmospheric Administration was calling for a range of 2-12” of rain. I understand that weather forecasting is not an exact science, but for me there is a big difference in the amount that 2” dumps and what 12 “ would look like. At two inches I would get the tractor bucket out after the storm passes, and do a little touch-up work on our gravel roads and driveways. After twelve inches in so few hours I would be knee-deep in insurance claims, as well as sleeping and cooking meals in our farmstand….for a long time, too. What did we really get in the end? In what was forecast to be the middle of the storm, I went out and mowed my lawn. And I could not have been happier to be doing so. Fall will always be a great season to me. There is plenty of natural color in the pumpkins, ornamental corn, and chrysanthemums as well as on the trees in the woods. The warmth in this season is welcome, as opposed to the intense sun and heat of summer. Fall crops roll into the pack house: beets, potatoes, turnip, carrots. Onions, garlic, leeks and cabbage. When it's cold, we can add a couple of thin layers of clothes to keep warm until the sun burns through the fall fogs and warms us. Migratory birds come and go, and soon we will start to lure the songbirds to the birdfeeders. In deep fall, the woodstove starts to operate with greater frequency. Then one day in November, it (the woodstove) will start its full time nonstop operation until late April, when the sun once more strengthens its grip on us all.


PRO-TIPS:

Shishitooooosssss!!  You know what to do, but if you have forgotten: bring these peps right to your pan or grill, shmear in olive oil and fry or grill until popped and blistered.  Salt and Devour immediately


FOR NOTES ON LEMONGRASS AND HOW TO USE:  head to the CSA blog - yes! Did you know that these newsletters get posted weekly on our web page? https://www.edgewaterfarm.com/csa-blog… 

Scroll back to week 10 and read up on all things lemongrass. 


BUT FOR MY FAVORITE THING TO DO WITH LEMONGRASS, SEE:


TOM KHA SOUP (Thai coconut chicken soup with chicken, mushroom and coconut milk)

  • 8 oz. (226 g) boneless and skinless chicken, breast or thighs, cut into strips or thin pieces

  • 20 canned straw mushrooms

  • 1 1/2 cups coconut milk

  • 1 cup water

  • 1 stalk lemongrass, cut into 3-inch lengths and pounded

  • 6 kaffir lime leaves , lightly bruised to release the flavor

  • 6 slices galangal

  • 8 bird's eye chilies, lightly pounded

  • 3 tablespoons fish sauce

  • 2 1/2 tablespoons lime juice or to taste

  • 1 tablespoon chopped cilantro

Add water, lemongrass, galangal, chilies, kaffir lime leaves into a pot and bring it to boil. Add straw mushrooms and chicken and boil it on medium heat for a few minutes or until the chicken is cooked through. Add coconut milk and boil for a couple more minutes. Turn off the heat and add lime juice and fish sauce to taste. Add chopped cilantro before serving.

If you can't find galangal, do not use ginger. Ginger is not the substitute for galangal. "Tom Kha" means galangal in Thai. However, if you absolutely can't find galangal and still wish to make this because you love this soup so much, just make it without galangal.


https://rasamalaysia.com/tom-kha-gai-recipe-thai-coconut-chicken-soup/


Spicy eggplant from the burma superstar cook book

Curry style eggplant awesome over rice.


3 Japanese Eggplants, cut into 1-inch cubes (about 6 cups)

1 teaspoon salt

2 ½ tablespoons canola oil

2 cups finely diced yellow onion

3 tablespoons minced garlic

1 tablespoon minced ginger

1-2 Thai chiles, thinly sliced or 2 tablespoons minced jalapeno

1 small dried chile, broken in half, seeds retained

2 teaspoons shrimp paste

½ teaspoon turmeric

½ teaspoon paprika

1 teaspoon fish sauce

Handful of fried garlic chips (for how to on garlic chips: again head to our CSA BLOG and scroll back to CSA week 6)

Cilantro or thai basil sprigs for garnish

1 lime or lemon cut into wedges for garnish


Season the eggplant with salt and scatter onto a clean dish towel.  Let it sit while you prepare the remaining ingredients, at least 10 minutes.  Once the eggplant begins to bead with water, wrap the towel lightly and squeeze to remove excess liquid from the eggplant.  


In a wok or pot, heat 1 tablespoon of the oil over medium-high heat.  Add the eggplant, lower the heat to medium, and cook, stirring often, until the eggplant begins to soften, about 4 minutes.  Using a slotted spoon, scoop out the eggplant and transfer to a plate.  


Heat the remaining 1 ½ tablespoons of oil in the wok.  Add the onions and cook over medium-low heat, stirring often to prevent scorching, until softened, about 4 minutes.  Stir in the garlic, ginger, fresh and fried chiles, and shrimp paste and cook until the onions are completely soft and starting to turn golden, 3 more minutes.  


Add the turmeric and paprika and then stir in the eggplant and about ½ cup of water.  Lower to a gentle simmer and cook, stirring occasionally, until the eggplant is very soft and most of the water has evaporated, about 5 minutes.  Season with fish sauce, adding more for a saltier flavor, and squeeze a wedge or two of lime over the top.  Serve in a bowl and top with cilantro (and or thai basil!).  Offer extra lime wedges along side.   


The 7th Inning Stretch September 14, 2021:   We are approaching mid September here. School is back in session and as if that weren’t a wake-up call, we are staring down the ultimate harbinger of fall with the arrival of the World’s Fair in Tunbridge, VT. Surely the days will start getting much shorter now, and we often remark about it. We will see the breaking out of sweatshirts, neoprene picking gloves, rain gear and wool toques. In their orange rain pants the crew looks like they just came off the boat from the TV series “Deadliest Catch.” As the season winds down, many farmers are licking their seasonal wounds. We are -in farmer terms- “just past the 7th inning stretch” in our seasons, and there is still much to accomplish. This includes a lot of planting and seeding within the greenhouses to serve the late fall CSA. Our onions are gathered up, the first of three plantings of carrots up and in the cooler, and if Mike can find enough parts between our two old potato harvesters to make one functional harvester, we will soon be digging our 6 acres of potatoes. Once that crop is all graded, sized and stored in our barn, we can start washing and shipping them. We can then turn our attention to: cleaning up the place; planting next year’s garlic; readying the strawberries with sprays and mulching for next spring; fixing broken doors and sills in our funky collection of old greenhouses. Then the contracts will expire on the Jamaican crew, and they will head home to tend their own farms by early November. Plenty to do, and seemingly insufficient time and bodies to make it through the list. I have heard the muttering of “I wouldn’t mind a good frost now….” and this time it didn’t come from my lips first. On many farms, the wet July here in the Twin States brought forth an epic surge of weed germination and growth…and Edgewater was no exception. We daily watched the galinsoga engulf the strawberries, with no spare hours available to get in there and clean it out. We are looking for a good frost to freeze it down, leaving the strawberries to bask in the filtering fall sunlight without competition. Fortunately, the strawberry plants are in very good shape, and we are (perhaps foolishly) getting optimistic about our spring prospects. But everyone is busy harvesting and packing out 10 hours a day, and soon the light levels will dictate just how long we will be able to work in the fields. Despite a crop failure with pumpkins and winter squash, we have an almost epic fall raspberries crop. Trying to harvest and move that crop is mopping up a lot of extra hours. In the farmstand we have had to close down on Mondays for the rest of the season, because of a labor shortage, and we have had to reschedule the help we have. Labor shortage or not, our melons,tomatoes, pepper, cut flowers, leeks will be out there for another 4 weeks unless a frost stops them in their steps. Weather continues to be the biggest challenge and unknown for farmers, along with a dearth of local labor. Our season started hot and droughty from the end of March until the end of June. It was abnormally hot for so early in the growing season, and that created some minor problems in the greenhouses, but there was a non-stop 10-15 mph breeze or wind that just never abated. I felt like we were trying to farm in Pueblo, Colorado. The lack of rain was tough enough, but the constant wind withered and devastated transplanted crops. Then, the weather changed, and in 20 minutes we got an inch of rain, and it then continued to rain off and on for a month. A lot of disease showed up, so we were confronted with trading one extreme problem for another. However, August turned up benignly normal, and with adequate moisture the potatoes sized up and the field tomatoes and melons kicked into gear. We have been challenged, but thus far undamaged, by hurricanes. Many of my seacoast friends prepared for the worst wind event they hoped never to see. Weather models were in constant flux for us here in the Upper Valley. On the Saturday that Hurricane Ida was making landfall on Long Island, the forecast for us from the National Oceanic and Atmospheric Administration was calling for a range of 2-12” of rain. I understand that weather forecasting is not an exact science, but for me there is a big difference in the amount that 2” dumps and what 12 “ would look like. At two inches I would get the tractor bucket out after the storm passes, and do a little touch-up work on our gravel roads and driveways. After twelve inches in so few hours I would be knee-deep in insurance claims, as well as sleeping and cooking meals in our farmstand….for a long time, too. What did we really get in the end? In what was forecast to be the middle of the storm, I went out and mowed my lawn. And I could not have been happier to be doing so. Fall will always be a great season to me. There is plenty of natural color in the pumpkins, ornamental corn, and chrysanthemums as well as on the trees in the woods. The warmth in this season is welcome, as opposed to the intense sun and heat of summer. Fall crops roll into the pack house: beets, potatoes, turnip, carrots. Onions, garlic, leeks and cabbage. When it's cold, we can add a couple of thin layers of clothes to keep warm until the sun burns through the fall fogs and warms us. Migratory birds come and go, and soon we will start to lure the songbirds to the birdfeeders. In deep fall, the woodstove starts to operate with greater frequency. Then one day in November, it (the woodstove) will start its full time nonstop operation until late April, when the sun once more strengthens its grip on us all.


PRO-TIPS:

Shishitooooosssss!!  You know what to do, but if you have forgotten: bring these peps right to your pan or grill, shmear in olive oil and fry or grill until popped and blistered.  Salt and Devour immediately


FOR NOTES ON LEMONGRASS AND HOW TO USE:  head to the CSA blog - yes! Did you know that these newsletters get posted weekly on our web page? https://www.edgewaterfarm.com/csa-blog… 

Scroll back to week 10 and read up on all things lemongrass. 


BUT FOR MY FAVORITE THING TO DO WITH LEMONGRASS, SEE:


TOM KHA SOUP (Thai coconut chicken soup with chicken, mushroom and coconut milk)

  • 8 oz. (226 g) boneless and skinless chicken, breast or thighs, cut into strips or thin pieces

  • 20 canned straw mushrooms

  • 1 1/2 cups coconut milk

  • 1 cup water

  • 1 stalk lemongrass, cut into 3-inch lengths and pounded

  • 6 kaffir lime leaves , lightly bruised to release the flavor

  • 6 slices galangal

  • 8 bird's eye chilies, lightly pounded

  • 3 tablespoons fish sauce

  • 2 1/2 tablespoons lime juice or to taste

  • 1 tablespoon chopped cilantro

Add water, lemongrass, galangal, chilies, kaffir lime leaves into a pot and bring it to boil. Add straw mushrooms and chicken and boil it on medium heat for a few minutes or until the chicken is cooked through. Add coconut milk and boil for a couple more minutes. Turn off the heat and add lime juice and fish sauce to taste. Add chopped cilantro before serving.

If you can't find galangal, do not use ginger. Ginger is not the substitute for galangal. "Tom Kha" means galangal in Thai. However, if you absolutely can't find galangal and still wish to make this because you love this soup so much, just make it without galangal.


https://rasamalaysia.com/tom-kha-gai-recipe-thai-coconut-chicken-soup/


Spicy eggplant from the burma superstar cook book

Curry style eggplant awesome over rice.


3 Japanese Eggplants, cut into 1-inch cubes (about 6 cups)

1 teaspoon salt

2 ½ tablespoons canola oil

2 cups finely diced yellow onion

3 tablespoons minced garlic

1 tablespoon minced ginger

1-2 Thai chiles, thinly sliced or 2 tablespoons minced jalapeno

1 small dried chile, broken in half, seeds retained

2 teaspoons shrimp paste

½ teaspoon turmeric

½ teaspoon paprika

1 teaspoon fish sauce

Handful of fried garlic chips (for how to on garlic chips: again head to our CSA BLOG and scroll back to CSA week 6)

Cilantro or thai basil sprigs for garnish

1 lime or lemon cut into wedges for garnish


Season the eggplant with salt and scatter onto a clean dish towel.  Let it sit while you prepare the remaining ingredients, at least 10 minutes.  Once the eggplant begins to bead with water, wrap the towel lightly and squeeze to remove excess liquid from the eggplant.  


In a wok or pot, heat 1 tablespoon of the oil over medium-high heat.  Add the eggplant, lower the heat to medium, and cook, stirring often, until the eggplant begins to soften, about 4 minutes.  Using a slotted spoon, scoop out the eggplant and transfer to a plate.  


Heat the remaining 1 ½ tablespoons of oil in the wok.  Add the onions and cook over medium-low heat, stirring often to prevent scorching, until softened, about 4 minutes.  Stir in the garlic, ginger, fresh and fried chiles, and shrimp paste and cook until the onions are completely soft and starting to turn golden, 3 more minutes.  


Add the turmeric and paprika and then stir in the eggplant and about ½ cup of water.  Lower to a gentle simmer and cook, stirring occasionally, until the eggplant is very soft and most of the water has evaporated, about 5 minutes.  Season with fish sauce, adding more for a saltier flavor, and squeeze a wedge or two of lime over the top.  Serve in a bowl and top with cilantro (and or thai basil!).  Offer extra lime wedges along side.   


The 7th Inning Stretch September 14, 2021:   We are approaching mid September here. School is back in session and as if that weren’t a wake-up call, we are staring down the ultimate harbinger of fall with the arrival of the World’s Fair in Tunbridge, VT. Surely the days will start getting much shorter now, and we often remark about it. We will see the breaking out of sweatshirts, neoprene picking gloves, rain gear and wool toques. In their orange rain pants the crew looks like they just came off the boat from the TV series “Deadliest Catch.” As the season winds down, many farmers are licking their seasonal wounds. We are -in farmer terms- “just past the 7th inning stretch” in our seasons, and there is still much to accomplish. This includes a lot of planting and seeding within the greenhouses to serve the late fall CSA. Our onions are gathered up, the first of three plantings of carrots up and in the cooler, and if Mike can find enough parts between our two old potato harvesters to make one functional harvester, we will soon be digging our 6 acres of potatoes. Once that crop is all graded, sized and stored in our barn, we can start washing and shipping them. We can then turn our attention to: cleaning up the place; planting next year’s garlic; readying the strawberries with sprays and mulching for next spring; fixing broken doors and sills in our funky collection of old greenhouses. Then the contracts will expire on the Jamaican crew, and they will head home to tend their own farms by early November. Plenty to do, and seemingly insufficient time and bodies to make it through the list. I have heard the muttering of “I wouldn’t mind a good frost now….” and this time it didn’t come from my lips first. On many farms, the wet July here in the Twin States brought forth an epic surge of weed germination and growth…and Edgewater was no exception. We daily watched the galinsoga engulf the strawberries, with no spare hours available to get in there and clean it out. We are looking for a good frost to freeze it down, leaving the strawberries to bask in the filtering fall sunlight without competition. Fortunately, the strawberry plants are in very good shape, and we are (perhaps foolishly) getting optimistic about our spring prospects. But everyone is busy harvesting and packing out 10 hours a day, and soon the light levels will dictate just how long we will be able to work in the fields. Despite a crop failure with pumpkins and winter squash, we have an almost epic fall raspberries crop. Trying to harvest and move that crop is mopping up a lot of extra hours. In the farmstand we have had to close down on Mondays for the rest of the season, because of a labor shortage, and we have had to reschedule the help we have. Labor shortage or not, our melons,tomatoes, pepper, cut flowers, leeks will be out there for another 4 weeks unless a frost stops them in their steps. Weather continues to be the biggest challenge and unknown for farmers, along with a dearth of local labor. Our season started hot and droughty from the end of March until the end of June. It was abnormally hot for so early in the growing season, and that created some minor problems in the greenhouses, but there was a non-stop 10-15 mph breeze or wind that just never abated. I felt like we were trying to farm in Pueblo, Colorado. The lack of rain was tough enough, but the constant wind withered and devastated transplanted crops. Then, the weather changed, and in 20 minutes we got an inch of rain, and it then continued to rain off and on for a month. A lot of disease showed up, so we were confronted with trading one extreme problem for another. However, August turned up benignly normal, and with adequate moisture the potatoes sized up and the field tomatoes and melons kicked into gear. We have been challenged, but thus far undamaged, by hurricanes. Many of my seacoast friends prepared for the worst wind event they hoped never to see. Weather models were in constant flux for us here in the Upper Valley. On the Saturday that Hurricane Ida was making landfall on Long Island, the forecast for us from the National Oceanic and Atmospheric Administration was calling for a range of 2-12” of rain. I understand that weather forecasting is not an exact science, but for me there is a big difference in the amount that 2” dumps and what 12 “ would look like. At two inches I would get the tractor bucket out after the storm passes, and do a little touch-up work on our gravel roads and driveways. After twelve inches in so few hours I would be knee-deep in insurance claims, as well as sleeping and cooking meals in our farmstand….for a long time, too. What did we really get in the end? In what was forecast to be the middle of the storm, I went out and mowed my lawn. And I could not have been happier to be doing so. Fall will always be a great season to me. There is plenty of natural color in the pumpkins, ornamental corn, and chrysanthemums as well as on the trees in the woods. The warmth in this season is welcome, as opposed to the intense sun and heat of summer. Fall crops roll into the pack house: beets, potatoes, turnip, carrots. Onions, garlic, leeks and cabbage. When it's cold, we can add a couple of thin layers of clothes to keep warm until the sun burns through the fall fogs and warms us. Migratory birds come and go, and soon we will start to lure the songbirds to the birdfeeders. In deep fall, the woodstove starts to operate with greater frequency. Then one day in November, it (the woodstove) will start its full time nonstop operation until late April, when the sun once more strengthens its grip on us all.


PRO-TIPS:

Shishitooooosssss!!  You know what to do, but if you have forgotten: bring these peps right to your pan or grill, shmear in olive oil and fry or grill until popped and blistered.  Salt and Devour immediately


FOR NOTES ON LEMONGRASS AND HOW TO USE:  head to the CSA blog - yes! Did you know that these newsletters get posted weekly on our web page? https://www.edgewaterfarm.com/csa-blog… 

Scroll back to week 10 and read up on all things lemongrass. 


BUT FOR MY FAVORITE THING TO DO WITH LEMONGRASS, SEE:

TOM KHA SOUP (Thai coconut chicken soup with chicken, mushroom and coconut milk)

  • 8 oz. (226 g) boneless and skinless chicken, breast or thighs, cut into strips or thin pieces

  • 20 canned straw mushrooms

  • 1 1/2 cups coconut milk

  • 1 cup water

  • 1 stalk lemongrass, cut into 3-inch lengths and pounded

  • 6 kaffir lime leaves , lightly bruised to release the flavor

  • 6 slices galangal

  • 8 bird's eye chilies, lightly pounded

  • 3 tablespoons fish sauce

  • 2 1/2 tablespoons lime juice or to taste

  • 1 tablespoon chopped cilantro

Add water, lemongrass, galangal, chilies, kaffir lime leaves into a pot and bring it to boil. Add straw mushrooms and chicken and boil it on medium heat for a few minutes or until the chicken is cooked through. Add coconut milk and boil for a couple more minutes. Turn off the heat and add lime juice and fish sauce to taste. Add chopped cilantro before serving.

If you can't find galangal, do not use ginger. Ginger is not the substitute for galangal. "Tom Kha" means galangal in Thai. However, if you absolutely can't find galangal and still wish to make this because you love this soup so much, just make it without galangal.

Spicy eggplant from the burma superstar cook book

Curry style eggplant awesome over rice. 

3 Japanese Eggplants, cut into 1-inch cubes (about 6 cups)

1 teaspoon salt

2 ½ tablespoons canola oil

2 cups finely diced yellow onion

3 tablespoons minced garlic

1 tablespoon minced ginger

1-2 Thai chiles, thinly sliced or 2 tablespoons minced jalapeno

1 small dried chile, broken in half, seeds retained

2 teaspoons shrimp paste

½ teaspoon turmeric

½ teaspoon paprika

1 teaspoon fish sauce

Handful of fried garlic chips (for how to on garlic chips: again head to our CSA BLOG and scroll back to CSA week 6)

Cilantro or thai basil sprigs for garnish

1 lime or lemon cut into wedges for garnish


Season the eggplant with salt and scatter onto a clean dish towel.  Let it sit while you prepare the remaining ingredients, at least 10 minutes.  Once the eggplant begins to bead with water, wrap the towel lightly and squeeze to remove excess liquid from the eggplant.  


In a wok or pot, heat 1 tablespoon of the oil over medium-high heat.  Add the eggplant, lower the heat to medium, and cook, stirring often, until the eggplant begins to soften, about 4 minutes.  Using a slotted spoon, scoop out the eggplant and transfer to a plate.  


Heat the remaining 1 ½ tablespoons of oil in the wok.  Add the onions and cook over medium-low heat, stirring often to prevent scorching, until softened, about 4 minutes.  Stir in the garlic, ginger, fresh and fried chiles, and shrimp paste and cook until the onions are completely soft and starting to turn golden, 3 more minutes.  


Add the turmeric and paprika and then stir in the eggplant and about ½ cup of water.  Lower to a gentle simmer and cook, stirring occasionally, until the eggplant is very soft and most of the water has evaporated, about 5 minutes.  Season with fish sauce, adding more for a saltier flavor, and squeeze a wedge or two of lime over the top.  Serve in a bowl and top with cilantro (and or thai basil!).  Offer extra lime wedges along side.   

CSA WEEK 13

- P I C K L I S T -

CHERRY TOMATOES - OREGANO - ROSEMARY - LEEKS - CORN - CAULIFLOWER - EGGPLANT - CARMEN PEPPERS - POBLANO PEPPER - ARUGULA/KALE - RASPBERRIES(!!)

FAF8E35A-FCB5-4BA8-B376-B046FC3A9B99.jpg

Hello from the occasional sunny Banks of the Connecticut river.  At this point, Fall seems imminent. 

All the crops and all the farmers took a collective deep breath this week as our region cooled, and field ripening began to slow down. Don't get me wrong, we will continue at a ridiculous pace until we reach the first kill frost, however there is a little relief in knowing that the cherry tomatoes are not in dire need of picking at this very moment.  Therefore we can take the time to look up from our bushel baskets full of peppers and eurocrates full of tomatoes and spend some quality time picking raspberries, finishing the onion harvest, turning over tired tomato greenhouses into new homes for Fall/winter greens and finally in the evening, canning the Summer tomatoes while we got’em.

Oh and if you’ve been a CSAer for a few years now, then you will REALLY appreciate the ½ pints of Fall raspberries- this NEVER HAPPENS, EVER! 

 PRO-TIPS

FIRST AND FOREMOST, this is an extremely versatile box that can go in EVERY DIRECTION.  ALSO It’s a really nice coupling of crops that eases the transition from grill season to roasting season.  There are literally a bajillion recipes that go with all this veg- so, I’m leaving you with 2 good ones- but I’d love to leave you with waaaaay more… here goes: 

quick backstory: I was sent this recipe by my bestie in Baltimore who is friends with a farmer down there (two boots farm) that insists this is not a Summer recipe to ignore.  The end.

 they write: (We always try to invest in a really good bottle of single origin extra virgin olive oil this time of year. It's fantastic with tomatoes and herbs etc)

For the marinade; scatter ½ tsp fennel seeds in a small cast iron frying pan over medium high heat.

-Dry roast until they begin to pop.

-Transfer to a mortar and pestle/coffee grinder/blender and crush.

-Place the crushed seeds in a small bowl and add the following…

1 lemon, the zest only

2 TBS finely chopped parsley leaves

¼ tsp oregano

2 TBS extra virgin olive oil

2 TBS walnut oil

1 garlic clove, put through a garlic press

½ tsp Maldon sea salt

Some freshly ground black pepper

-Tear/break apart 8-9 ounces of fresh buffalo milk mozzarella.

-Smear the marinade on the mozzarella and let stand for 15-30 minutes.

-To serve, cut 2 ripe tomatoes into wedges and/or 1 basket of cherry tomatoes into halves.

-Plate the tomatoes along with the marinated cheese.

-Drizzle with extra virgin olive oil and serve.

(this recipe i have used for YEARS as my go to for romesco sauce making and then freezing- refer back to this in the coming weeks as the sweet peppers start to stack up)

Sunflower Romesco Sauce

  • ½ cup toasted sunflower seeds

  • 2 roasted red peppers, homemade or from a jar

  • 2 cloves of garlic, chopped

  • 1 teaspoon smoked paprika

  • ½ teaspoon aleppo pepper or a pinch of cayenne

  • 2 tablespoons sherry OR apple cider vinegar

  • 1 tablespoon tomato paste

  • small handful flat parsley leaves

  • sea salt and ground black pepper, to taste

  • scant ½ cup extra virgin olive oil

Stuffed Eggplant

  • 2 small-medium eggplants

  • olive oil

  • sea salt and ground black pepper

  • 1 small shallot, chopped

  • 1 clove garlic, chopped

  • ¼ cup romesco

  • 2 tablespoons fresh lemon juice

  • 2 tablespoons tahini

  • 4 servings cooked grain of choice (I used quinoa)

  • big handful of fresh and leafy herbs, chopped (I used cilantro, parsley & a bit of dill)

  • toasted sunflower seeds or dukkah, for topping

INSTRUCTIONS

  1. Make the sunflower romesco: In the bowl of a food processor, combine the sunflower seeds, roasted red peppers, garlic, paprika, aleppo pepper, vinegar, tomato paste, parsley, salt, and pepper. Pulse the mixture until all ingredients are finely chopped and lightly pasty. Scrape the bowl down. Then, with the motor on low, drizzle the olive oil in through the feed tube until fully incorporated. Check the sauce for seasoning. Transfer sauce to a sealable jar, and set aside in the fridge until ready to use.

  2. Preheat the oven to 350°F.

  3. Cut the eggplants in half lengthwise, right through the stem. Using a paring knife, carve into the eggplant flesh all the way around the perimeter. Pry the eggplant flesh out of the eggplant halves with your fingers or a spoon and set it aside. Place eggplant halves on a baking sheet, facing up. Brush the eggplant halves with olive oil and season with salt and pepper. Bake eggplant for 20 minutes, or until golden brown and lightly tender.

  4. Roughly chop the scooped out eggplant. Heat a bit of oil in a medium-large sauté pan over medium heat. Add the shallots and garlic to the pan and sauté until fragrant and slightly soft, about 2 minutes. Add the chopped eggplant, and season with salt and pepper. Stir. Sauté the eggplant, stirring occasionally, until tender, browned, and slightly reduced in size, about 4 minutes.

  5. Carefully transfer eggplant to the food processor. Add the ¼ cup of romesco, lemon juice, and tahini to the food processor as well. Pulse the mixture until you have a chunky paste.

  6. To serve, divide the warm eggplant filling evenly among the eggplant “boats.” Then, spoon your cooked grain of choice on top along with a sprinkle of chopped herbs. Garnish the tops of the stuffed eggplants with more romesco and toasted sunflower seeds or dukkah. Enjoy warm.

NOTES

  • If you want to keep this more traditional, use toasted almonds or even a mix of almonds and hazelnuts in place of the sunflower seeds.

  • If you’d like to make this grain-free, try stuffing the eggplant with herbed cauliflower rice, or something like this recipe of mine from way back.

  • I don’t have any concrete suggestions on lowering the amount of oil in the romesco, unfortunately. I found that the mixture tasted quite good before I added it though, but was a still little sharp/intense. Perhaps try ¼ cup of water in place of the oil and add more if necessary.

  • Romesco is good in a sealed jar in your refrigerator for 5-7 days. I dare you to even TRY making it last that long though. I love it with grilled/roasted vegetables, tossed with pasta and chickpeas and herbs, and swooped up with crusty bread, obviously.

  • If you’re starting from scratch with this recipe and finishing it to the end, no need to wash the food processor out after you make the romesco. You’ll need it for the eggplant!


CSA WEEK 12

- P I CK L I S T -

CHERRY TOMATOES - PLUM TOMATOES - PARSLEY - MELON - 

RED ONIONS - POTATOES (AUSTRIAN CRESCENT & FRENCH RED FINGERLINGS ) - 

EGGPLANT (3 varieties: GRAFFITI - CHINESE - JAPANESE)  - CARMEN PEPPERS 

OK EVERYONE!  FALL CSA INFORMATION IS MOSTLY HERE!! READ ON!

Our Fall CSA is extremely near and dear to my heart.  Our Fall CSA is a way to keep our beloved community eating all the good crops and stay involved with the farm even after the stand shuts down mid-October.  Bottomline here, although the farmstand closes after Indigenous Peoples Day, there is still so much to harvest, and so much to enjoy.  And from my end, it’s an extremely chill scene. I just love it.   

One pick up location: THE FARMSTAND, One pick up time: 4:30-6:pm 

Last year we pre boxed your CSA due to constantly changing COVID protocols.  At this point, I am inclined to go back to the previous model: Loose Farmstand pick up- you bring your own box to fill… But please know that this could change at any moment.  We are ready either way.  

And now the good deets:

1) It’s 7 weeks of real hearty Fall abundance (root veggies, winter squash, greens, herbs, the last of the peppers and tomatoes,  etc..).  Newsletter + recipes also included. COST: $245

2) ADD ON BREAD SHARE Cost: $37

3) ADD ON KITCHEN GOODS SHARE (salsa, sauces, pesto, jam, maybe even some fermenty treats) Cost: $52 

4) Pick up location is on farm in Plainfield NH 

5) PICK UP TIME: 4:30-6pm

6) PICK UP DAY: WEDNESDAYS! (with a special pre-thanksgiving pick up on Tues. NOVEMBER 24TH)

7) Begins October 13TH- November 23rd (you must sign up for the 7 consecutive weeks)

8) COST FOR FALL CSA: $245 / COST FOR BREAD SHARE ADD ON: $37 / COST FOR KITCHEN GOODS ADD ON: $52

Aside from those changes, the rest remains the same!!!

Sign up RIGHT HERE at the FARMSTAND or ONLINE: www.edgewaterfarm.com

 As always and forever: Peace, love, and carrots

PRO TIPS:

The strategy for these pickled red onions is (as one astute reviewer noted) pretty much just “mix everything together and wait.” One more boon for the recipe? It’s entirely made up of pantry staples. The pickling liquid is just a mix of water, salt, sugar, and vinegar—we’ve opted for apple cider, but white wine vinegar, red wine vinegar, sherry vinegar, or rice wine vinegar would all be fine. After letting your quick-pickled red onions sit for at least an hour to soften and marinate, drain them, and then put them to good use brightening up a juicy pile of ribs, sub them into your favorite breakfast sandwich, or scatter them atop a lunchtime grain bowl. They might be simple to make, but these pickled red onions have layers

½ cups apple cider vinegar

1 tablespoon sugar

1½ teaspoons kosher salt

1 red onion, thinly sliced

Whisk first 3 ingredients and 1 cup water in a small bowl until sugar and salt dissolve. Place onion in a jar; pour vinegar mixture over. Let sit at room temperature for 1 hour. 

DO AHEAD: Can be made 2 weeks ahead. Cover and chill. Drain onions before using.

(Serves 4)

The trick is to slice it thick-ish and salt it generously. Let it sit out releasing puddles of water. Pat dry aggressively, cover in corn starch aggressively and then fry in hot oil until it comes out golden and dark brown in some places (you want to make sure the eggplant meat inside is cooked, custardy and sweet). I have topped the eggplant in this pic with garlicky tahini, amba (mango pickle sauce), fresh parsley and sea salt but you can really do whatever you want here. Someone suggested drizzling it with honey or silan (date syrup) and once I tried that….you’ll see.

 1 large eggplant or 2 medium eggplants

kosher salt

1 cup cornstarch

4 cups canola oil or any oil with no flavor and a high smoke point like grapeseed, sunflower, veggie

sea salt to finish

serve with garlicky tahini (recipe below), amba, fresh parsley, fresh lemon, parsley, honey

 Directions- Slice the eggplant in 1/2 inch thick pieces. You have the option of keeping the skin on or removing the skin. I keep it on, because I don’t like to waste it but if you remove the skin, it will get even crispier. Place the eggplant slices on a sheet tray and generously salt the eggplant. Let it sit out at room temp for at least 1 hour. Puddles of liquid will come out of the eggplant. Before frying, take a kitchen towel and pat down the eggplant well, drying them off as much as possible. Slice in half on a diagonal (I think they are too big to fit in a sandwich or a pita this way so I like to slice them in half) Place the cornstarch in a bowl and toss each piece in the cornstarch well. Shake off excess and place on a dry sheet tray. Heat up the oil in a deep pot. If you don’t have a thermometer (which I don’t) heat on high and sprinkle a little cornstarch in the oil. If it sizzles it should be ready. Turn the heat to medium high it should be around 350 degrees f and add in the first piece. I like to fry one at a time so that the oil temp stays up (if you overcrowd the oil the temp will come down and the eggplant wont fry they will soak)

 Flip the eggplant over once the bottom is golden and brown in some places around 1-2 minutes. When the other side is golden another 1-2 minutes remove from the oil and place on a paper towel to let dry. Immediately season well with sea salt.

 Serve this eggplant on its own, on sandwiches, in pitas…you can do a lot with it.

 For my crispy eggplant fries, I peeled the eggplant and sliced them into 1/2 inch thick pieces. Salted them and let them sit out for an hour, pat dry and then sliced them into strips (keep them thicker so that there is enough eggplant inside to get creamy, while it’s frying). Toss the strips in the cornstarch and 1 handful at a time fry in the oil until golden. Let it fry for 3 minutes until they are golden and lightly browned (make sure they get to that golden light brown color, you want the meat inside to cook). Remove from the oil and place on paper towel. Season well with salt and serve with yummy condiments like garlicky tahini, amba, silan, honey….etc.

 Garlicky tahini

1/2 cup tahini paste

2 tsp fresh lemon juice

1 small garlic clove, finely grated

large pinch kosher salt- or to taste

3 tablespoons cup ice water

Directions- Place everything in a bowl and mix. The tahini will get thick and pasty but keep mixing. Add more water to loosen, if needed.

 IF YOU NEED ANYMORE EGGPLANT INSPO: GOOGLE BABA GANOUSH! OR GRILL


CSA WEEK 11

- P I C K L I S T -

CHERRY TOMATOES - SHISHITO PEPPERS - SCALLIONS - GARLIC - MELON - 

THYME - TULSI - ARUGULA - HABANERO - CARROT - LEMON CUKE - CORN

C1AE5232-CEC3-4464-AD5F-B6FD13572C89.jpg

I’m going to go through the farm update in bullet points because I’m pooped and I’m fairly certain this is the best move for my current condition: Late August jello brain. 

  • Fall CSA plans are currently in the works!  Stay tuned for more info on that- expect an email in the coming weeks- and when posted, sign up ASAP if you want to continue to party with us until Thanksgiving.  

  • Ok, I think we’ve all learned the weekly pattern- 3 days of insane heat followed by 3 days of damp conditions.  It’s become a huge nuisance of when to do what and how to keep crops happy.  That said, our melons and cherry tomatoes LOVE the heat. Eggplant supply is slowly getting better, and there are a good amount of peppers in the field.  However we are ALL waiting for them to sweeten up and turn from green to red, yellow, orange, etc…

  • I survived the first CSA week without sidekick Kayleigh.  Deep exhales here.  

  • Oh and something I’ve been meaning to bring up:  Just In case every week you go pick up your share and are constantly disappointed by the lack of dill and cilantro- I want you to know that I feel ya on this.  Our first cilantro and dill crop got eaten by weeds, and our second just continues to putter through life, never really taking on much growth.  I’m constantly visiting the current cilantro/dill planting and eyeing it up for new life, but goodness it is not loving its current home.  If you are looking to make salsa, etc and are need of cilantro to do so- i might suggest reaching out to another farm.  Sorry yall, sometimes crops just fail and it’s a total bummer.

  • For those entering into pack-school-lunch season, this box is for you!! School lunches made so easy with cherry tomatoes! Carrot sticks! Cut up melon! The kids will go nuts… or they will come home begging for dunk-a-roos and pudding snacks but hot damn we try!


PRO TIPS:

TULSI:  Yall have alot of cherry tomatoes to get through and process, so I would recommend brewing your tulsi tea now (with honey to taste)- cool it down in the fridge and drink often over ice as the temps rise over the next few days.  Add some mint sprigs and you will have the ultimate relaxing cool down.  Completely necessary bevvy as we continue to get deeper into tomato processing time- it’s a work out!  

TIME: 3 HOURS:  I know what you’re going to say: “You want me to turn on my oven in the middle of the summer for three freakin’ hours? Are you insane?” And all I can say is, well, yes, but also the oven is so low that I swear it won’t heat up your apartment in any noticeable or annoying way.

  • Cherry, grape or small Roma tomatoes

  • Whole cloves of garlic, unpeeled

  • Olive oil

  • Herbs such as thyme or rosemary (optional)

Preheat oven to 225°F. Halve each cherry or grape tomato crosswise, or Roma tomato lengthwise and arrange on a parchment-lined baking sheet along with the cloves of garlic. Drizzle with olive oil, just enough to make the tomatoes glisten. Sprinkle herbs on, if you are using them, and salt and pepper, though go easily on these because the finished product will be so flavorful you’ll need very little to help it along.

Bake the tomatoes in the oven for about 3 hours. You want the tomatoes to be shriveled and dry, but with a little juice left inside–this could take more or less time depending on the size of your tomatoes.

Either use them right away or let them cool, cover them with some extra olive oil and keep them in the fridge for the best summer condiment, ever. And for snacking.

The sunday/monday meal:  Roy (and much of our other crew) comes North from Jamaica to farm with us from May-November and has found ways to keep Jamaican flavors going up here in rural NH.  For example the staple meal, rice and peas aka Sunday/Monday.  A part of Roy’s Sunday ritual is to make food for the week.  He calls it his Sunday/Monday. Sunday/Monday is rice and peas which is essentially the most delicious rice and beans.  We went over the recipe this week while picking thyme and then I hit the internet for a writeup and low and behold, brooklynactivemama.com provides:

1/2 cup dark red kidney beans (dry)

1 1/2 cups coconut milk

1 scotch bonnet pepper/ OR HABANERO!!  Sadly not as fruity as a scotch bonnet but a great substitute nonetheless

3 garlic cloves

1 teaspoon salt

3 sprigs thyme

2 cups Jasmine rice

1/4 teaspoon ground allspice

3 scallions

2 cups water

  1. Soak the peas (aka red kidney beans) in a bowl with the water for 24 hours, if you don't have that kind of time soak for at least 2 hours.

  2. Chop the Scallion & Garlic

  3. Once the peas are properly soaked (they will likely plump and absorb a lot of the water) place the peas and the water in a saucepan.

  4. Fill the pot with additional water if needed--the water should be about 2 inches over the peas. Bring to a boil.

  5. Add the garlic, scallions, & thyme. Add the salt & allspice. Add a full scotch bonnet (habanero) pepper (do NOT slice, put it in WHOLE).

  6. Cook for 20 minutes. (Peas may cook quicker depending on how long you soaked them)

  7. Continually add cool water as needed to make sure that the peas don't burn. Watch closely! You know that the peas are cooked when you can break the peas in half easily with a fork.

  8. Remove and discard the scotch bonnet pepper. Add the coconut milk and the uncooked rice. Stir throughly.

  9. Important: There should only be about a half an inch of liquid above the peas and rice. Turn stove down to medium/low and stir (I use a wooden spoon to make sure no rice sticks to the bottom) every 5-7 minutes until cooked.

  10. In about 30 minutes you will have fluffy and yummy rice and peas!

A lot of folks ask if they can do this recipe with canned beans, I wouldn't recommend this as it increases the water content substantially.

GRILL!! YALL.  Shmear your shishitos with olive oil - toss them on a grill- cook until blistered, sprinkle with salt, and devour immediately.  While you're at it- if you haven't eaten your scallions from last week and you are feeling overwhelmed by this allium- add this to your bucket of shmearing oil and toss on grill.  YOU WILL NOT BE DISAPPOINTED.  

CSA WEEK 10

P I C K L I S T

KALE - CHERRY TOMATOES - PLUM TOMATO - MELON - LEMONGRASS - THAI BASIL -

JALAPENOS - SCALLIONS - HAKURAI TURNIPS OR DAIKON RADISH -

BELL PEPPER - LEMON CUKE - SLICING CUKE - ZINNIAS!!!!

The New England growing season is terribly short (June-October).  We break up this tiny passage of time into short bursts we call seasons: strawberry season (5ish weeks), blueberry season (3ish weeks), melon season (JUST GETTING STARTED WOOT WOOT!!), etc…  These fruit bursts force you to show up and give all you got because the harvest is so fleeting and nothing during any other time of year compares to the season that you are currently in.  As we combine melon season with the entrance of tomato season, we simultaneously welcome in the real muscle season:  canning season.  August is this wild month where everything (all the crops) catch up and suddenly you are hit with this pain in your gut that SUMMER IS SHORT and SUMMER IS ALMOST OVER and holy shit, it's time to savor every bit of it and figure out ways to bottle up the sun.  So, I turn to processing veg (can/pickle/ferment/freeze) as a coping mechanism to battle the inevitable change to Fall.  Also, canning  is pretty fun and deeply satisfying and mostly delicious (however there is the occasional science fair experiment gone wrong).  From here on out, with every CSA that comes and goes, I will try my best to provide one item in bulk(ish) that will beg you to be processed, so you too, can take summer with you into the cold dark months ahead (i hate winter).   

But before we go into pro-tips and how exactly you are going to deal with all those jalapenos- I need to tell y'all about this extremely productive and joyful experience that occurred weekly alongside the CSA Summer Harvest: enter, Kayleigh season.  Kayleigh worked at the farm years prior, but we never connected- she was slingin veg at the farmstand, and I was picking veg in the field.  This year she approached us looking to get back to Edgewater and low and behold, I needed help. AND-SHE-SHOWED-UP.  Yall, Kayleigh season lasted for 9 whole weeks and I am GRATEFUL for every single one.  Working alongside Kayleigh is actual magic.  Her work ethic is insane, her jokes slap, and while paying attention to every detail of every task, she is constantly looking ahead, reading my mind, and lightening the load.  On top of all this, she glows and our convos flowed.   My best connections and life changing conversations always happen during a full day outside- sunrise to sun up- in a field, during a harvest with someone great.  She is someone great.   Kayleigh season ends today. Next week she begins Nursing school and I’m so excited for her… (to take care of me when I'm in need of medical care jkjkjk). 

All that said, so long Kayleigh season- a damn good season- all too fleeting, powerful, and so full of joy.  


PRO TIPS:

This recipe is recommended by my dear friend Sam who is a master jalapeno pickler… He gives the following suggestions:

  • I would use less sugar 

  • Also you can put the sliced jalapenos in the jar and just pour hot pickling liquid over it.

YIELD: 1 PINT SIZED JAR  The BEST recipe for easy homemade pickled jalapenos from scratch! Fresh jalapeños pickled and jarred.

15 to 20 large jalapeños, sliced, stems discarded 2 garlic cloves, smashed and peeled

1 cup distilled white vinegar 1 cup filtered water

4 tablespoons sugar (optional as it is for flavoring) 2 tablespoons kosher salt

  1. In a medium sauce pan combine the garlic, water, vinegar, sugar and salt.

  2. Heat to a boil, stirring to dissolve the sugar and salt. Once at a boil; add the sliced jalapenos pressing them so they are submerged under the pickling liquids. Remove the pot off of the heat and let them sit for 10-15 minutes.

  3. Use tongs to transfer the jalapenos into a clean jar. Ladle the pickling juices over top until you've reached the top of the jar. Let cool at room temperature before securing a lid and popping them into the fridge.

  4. I personally would treat these as I would any opened jar of jalapenos. They should last a long while if kept refrigerated in the airtight jar.

  5. **REVISED: I've found that 20 medium jalapenos will fill a quart size jar. I upped the water and vinegar to 1-1/4 cups each. Sugar and salt stayed the same.

*This is not a canning recipe therefore not shelf stable and will need to be kept refrigerated.  With that said, I personally would treat these homemade pickled jalapeños as I would any opened jar of pickled produce in your fridge. They should last a long while if kept refrigerated in the airtight jar. Also, the spicy heat of the peppers should mellow out the longer they are in your fridge.  If looking for canning instructions or directions, follow the USDA guidelines.

BY SHOSHI PARKS (bonapp)

As its name suggests, lemongrass is a grass with botanical origins that stretch across South and Southeast Asia, from India and Sri Lanka to Indonesia and the Philippines. Also called Malabar grass, Cochin grass, or fever grass among many other names, lemongrass (Cymbopogon citratus) grows in large bushy clumps. Its stalks are woody and pale green with bulbous lighter-colored bases that are somewhat reminiscent of green onions. Used whole, chopped, or pummeled into a paste, lemongrass adds a light but complex flavor and aroma—simultaneously lemony (hence the name), gingery, and floral—to sauces, soups, and meats.

In some parts of the world, lemongrass is also treasured for its health benefits. When brewed into a tea, the plant is considered an immunity-boosting treatment for a wide variety of ailments including gastrointestinal distress, fever, and asthma.

How can you use it? In South and Southeast Asian cooking, lemongrass commonly conspires with ingredients like garlic, galangal (and/or ginger), cilantro, Thai basil, shallots, lime leaves, and coconut milk to create bold, complex flavors.

To prepare lemongrass, start by peeling the stiff outer leaves away from the stalk to reveal the slightly softer underlayers. Slice the grass in two spots, about half an inch from the root and approximately three inches up, where the whitish color begins to turn green.

The pale lower section of the lemongrass is the meatiest bit. Even so, it must be sliced thin and then finely chopped, pounded into a paste with a mortar and pestle, grated with a box grater, or tossed in a food processor so that it isn’t too tough to chew. This is frequently how lemongrass is used in Cambodian cooking, Yun says, especially in the preparation of the spice paste kroeung.

Lemongrass is often finely chopped or pounded in order to break down the tough stalks.

Once minced or pounded, lemongrass can be added to marinades or grilled meats for a touch of sweet citrusy flavor or used to brighten curry pastes and simple sauces. Powdered lemongrass works here too. “Start with one teaspoon powder per lemongrass stalk, but be sure to taste as you go to make sure you’re getting that lemony-ginger bite,” Payumo advises. 

And despite the fact that lemongrass isn’t traditionally used in recipes of Western origin, adding it to creamy pastas or homemade ice cream is an unexpected delight.

But while only the lower bulb of the lemongrass stem is edible, every portion of the stalk has a role to play in the kitchen. The fibrous upper section of the stalk is full of tons of lemony, gingery goodness. To release the flavorful oils, both Yun and Payumo like to bash or flatten the lemongrass stalk with a cleaver or the side of a large knife. Payumo will also sometimes bend the stalk back and forth a few times instead of smashing it to release the oils.

Fresh lemongrass stalks work best in dishes like soups and slow-roasted meats that simmer for long periods of time. In Filipino cuisine it’s commonly stuffed inside whole pigs or chickens and then roasted, Payumo says. Extensive simmering or roasting is also the best use for dry lemongrass, which rehydrates as it cooks. Like with bay leaves, remove the lemongrass stalks from the dish before serving. 

Bruised, oil-rich lemongrass stalks work in the glass too. They not only make a mean cocktail stirrer, but they can also infuse spirits with almost no effort at all. Go ahead, throw a lemongrass stalk or two in a bottle of vodka and let it sit for a week before drinking. You won’t be sorry.

How should you store it? If you store it right, lemongrass will pretty much last forever. Wrapped loosely in a towel, the stalks will stay fresh and flavorful for a few weeks in the fridge. Otherwise, they’ll do just fine in the freezer, either uncut or pre-prepped. Try portioning minced, pounded, or grated grass into an empty ice tray for no-fuss future use. Dried and powdered lemongrass should be kept in sealed containers and out of the light.

Now go smash, slice, and pound away. You may not be getting to South or Southeast Asia this year, but with your new lemongrass skills, at least your culinary skills will permit you to imagine.